
Are you attempting to figure out how to successfully wire a 50 amp RV plug? More and more people are hitting the open road in their RVs, and it’s important that you know how to handle electrical needs when you’re on the go. In this blog post, we will help you understand the wiring process every step of the way. We’ll answer common questions and provide some useful tips along the way!
Table of Contents
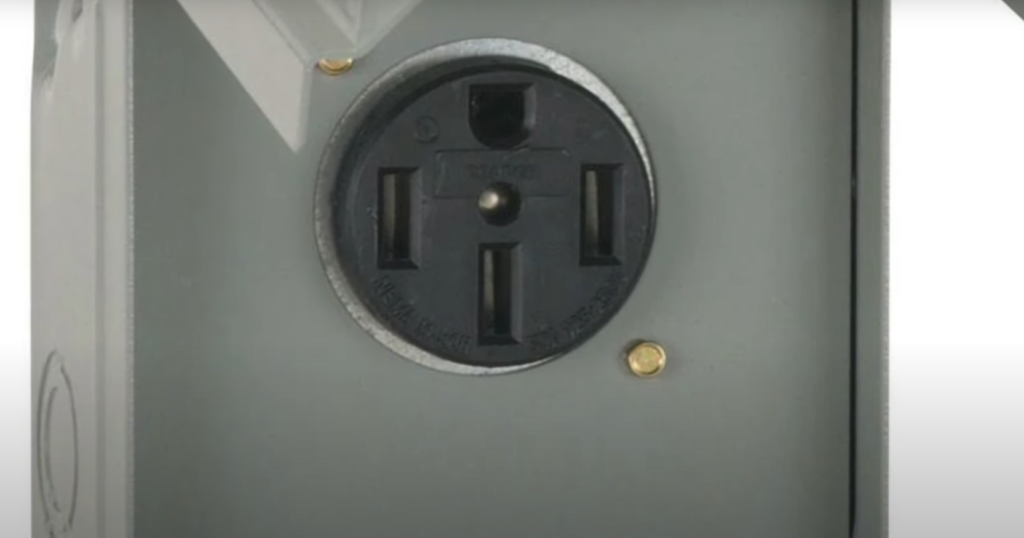
What is a 50 amp RV Plug?
This type of plug/outlet is usually installed on the back of an RV, allowing connection to a dedicated circuit in either a house or campground.
Most RVs are already equipped with one or more 50-A plugs, but if you’re looking to upgrade your setup, you may need to wire it yourself. Knowing how to do that requires careful research and preparation. [1]
How To Wire A 50 Amp RV Outlet/Plug
Installing a 50 A plug into an RV is a job that most people can do by following some basic safety precautions and steps.
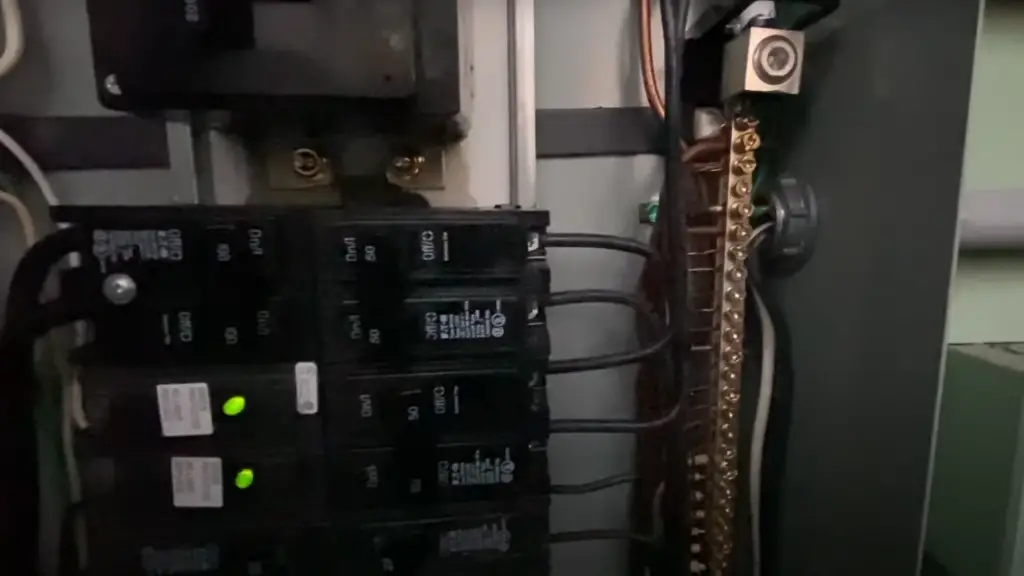
Prior to beginning any electrical wiring project, it is critical to switch off the power supply in order to ensure your safety. In this case, you’ll want to shut off power from the main panel box at your campground before beginning work on the wiring. Once you’ve confirmed that no electricity is running in the area, it’s time to begin the installation.
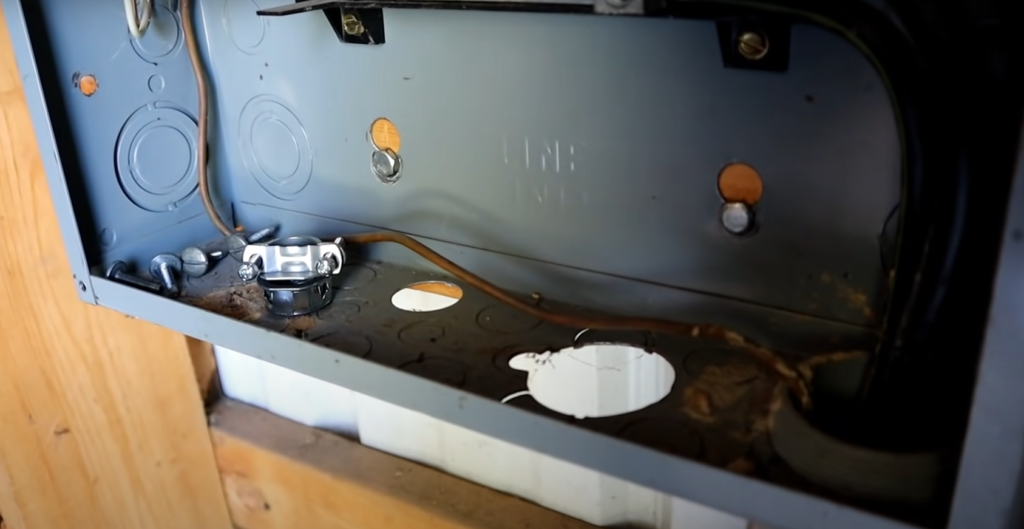
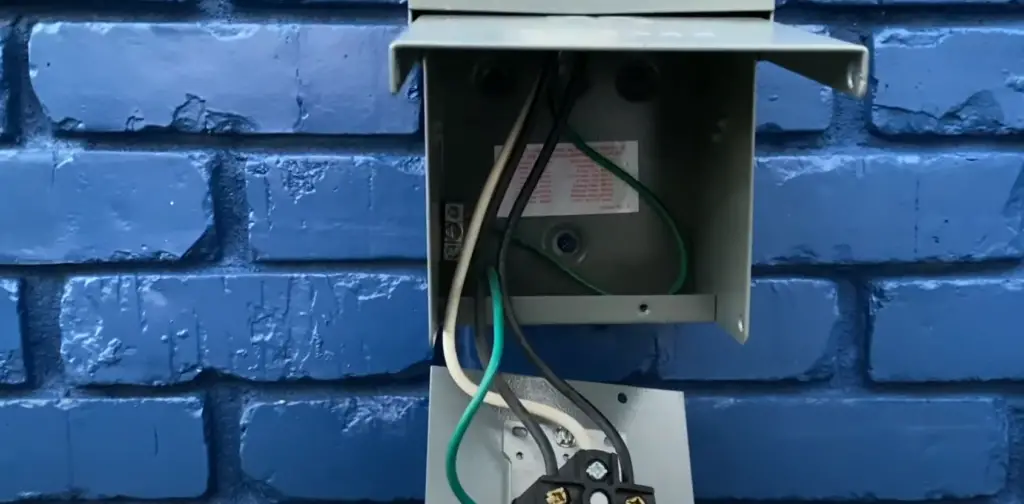
To properly install, you will need five types of wire: a ground wire, two hot wires, a neutral wire and an RV cord. You will also need tools such as a drill, screwdriver and pliers.
To begin wiring the plug itself, attach the ground wire to the green screw on it’s back. Then connect one of the hot wires to either of the silver screws on each side of the outlet. Next, attach the other hot wire to another silver screw opposite from where you attached it before. Finally, connect your neutral wire to both white screws inside the plug box.
Once all your wiring is complete and secure, you can now run your RV cord through an appropriate conduit if needed. After running the RV cord from the box to your RV, attach it to the outlet on your RV with the correct screws for each of the wires.
Once all these steps are completed, you can now turn on the power. Get a small voltage tester and check that electricity is flowing properly through each wire. If any issue arises during this step, make sure to rectify it before attempting to use the plug/outlet.
Wiring Process: Steps
- Start by turning off the main power breaker. This is an important first step in any electrical wiring project, it prevents any accidents from happening.
- Obtain the necessary materials for the job, including a 50amp RV power cord with three prongs, a 30 A to 50 A adapter plug and a screwdriver or nut driver for tightening connections.
- With all of your materials ready, begin by connecting the black hot wire to the terminal marked “L1” on your adapter plug. If you are using a non-metallic sheathed cable, you will also need to attach the bare ground wire to the terminal marked “GND”.
- Once you have your hot wire secure in place, attach the white neutral wire from your RV power cord to the terminal marked “N”. Secure all of these connections using screws and a screwdriver or nut driver.
- With all three wires connected, turn on the main breaker and test your connection by plugging in an appliance or device that requires 50 A of electricity. Once it is working properly, be sure to affix any covers over exposed wiring so as not to risk electric shock or fire hazard when not in use.
You can easily wire an RV plug, allowing your recreational vehicle to take advantage of the power provided by a standard electric outlet. For more tips on wiring and other electrical projects, be sure to check out our blog for advice from professional electricians.
Testing The RV outlet
Testing the outlet once everything is connected is a must. Ensure that your connections are tight and that they won’t come loose while you drive. Make sure to use a voltage tester to check the wiring one last time before you hit the road.
If you don’t have a voltage tester handy, then use an Ohm meter or multimeter to test for continuity. The device should show zero ohms if there is good contact between the plugs and wires. If not, then you may need to adjust one of your connections until there is good contact.
AstroAI Multimeter 2000 Counts Digital Multimeter
This is a great tool for testing your RV outlet. It’s easy to use and can help you test for continuity, voltage, current, resistance, and more. This device will ensure that everything is connected correctly and working properly before you start your trip.
Surge Protector
It’s also a good idea to use a surge protector for your RV outlet to protect your electronics from power surges. The surge protector will help ensure that your connections stay tight and that there is no damage done by any unexpected power spikes.
Using The RV outlet
Using the outlet is a very simple affair. If everything goes according to plan, your RV will be powered up in no time!
It’s important to understand a few basics about electrical safety. Electricity can be dangerous if not used correctly, so make sure you read all instructions carefully before beginning work on any electrical project. In addition, always ensure that the wiring conforms to local electrical codes; this may require hiring a professional electrician.
Finally, take care of your outlet and make sure that it’s clean and free from dirt. This will ensure that the connections are tight and secure, reducing the risk of shorts or sparking. [2]
Safety Tips
When wiring, it is important to take the necessary steps to ensure your safety. Here are some tips:
- Always wear protective eyewear and gloves when working with electrical components.
- Make sure you thoroughly read the instructions on both the plug and outlet so that you know how they should be wired together.
- Disconnect all power sources before beginning your work.
- Check for any exposed wire by using a voltage tester or multimeter. Exposed wires could shock you if touched directly.
- Securely attach all connections, making sure that the grounding screw is properly tightened and grounded to an appropriate metal box or junction box enclosure. Ensure there are no gaps at joints which may cause sparks.
- Double check your work to make sure all connections have been securely tightened and that the wire is properly routed along the frame of the RV.
- Ensure a ground fault circuit interrupter has been installed so that any potential electrical issue will be caught before it becomes dangerous.
FAQ
Is a 50 amp RV hookup 110 or 220?
It is typically either a 110/120-volt or a 220/240-volt service. It’s important to know the voltage of your particular hookup in order to wire it correctly and safely. Most RVs require a 50 A plug for full power, but some have 30 and 20 amps as well, which will require different wiring procedures. [3]
What size wire is needed for a 50 amp RV plug?
The size depends on the current draw of your appliance. Generally speaking, it’s recommended to use 8-gauge wire for up to 30 amps, 6-gauge wire for up to 40 amps, and 4-gauge wire for up to 50 amps. If you are unsure about the wire size for your particular application, it would be best to consult an electrician. [4]
What do I need to install a 50 amp RV plug?
Its installing involves more than just wiring the plug itself. You will also need some tools and materials, including:
- An electrical tester or voltage meter
- A screwdriver
- Wire cutters
- Electrical tape
- Nails and screws (for mounting the box)
- Nonmetallic sheathed cable of appropriate gauge for the amperage of your circuit (e.g., 10 AWG for 30 amp, 8 AWG for 40 amp, 6 AWG for 50 amp).
- A metal junction box to house the connections
- The appropriate size breaker and switch in your distribution panel.
Once you have all of these items gathered, you’re ready to begin.
Is a 50 amp RV plug single phase?
Yes, it is. It has three prongs. The 2 hot leads are often referred to as X and Y, with the ground being the third prong. [5]
Can I wire a 50 amp RV outlet by myself?
Absolutely! You have the capability to wire it without assistance. It’s important to note that this is a complex task and should only be attempted by someone with experience in electrical wiring.
Follow these steps:
- Purchase all necessary components for the job including a 50 amp RV receptacle box, appropriate wire size (6 AWG), and 3/4′ conduit connectors.
- Put on protective clothing and safety glasses.
- Install the box, using appropriate screws and anchors in accordance with local building codes.
- Feed the power supply cable through the conduit connectors that have been previously installed on the outlet box.
- Strip off about 3/4′ of insulation from each end of the 6 AWG wire before connecting it to the RV plug terminals.
- Connect secure wiring connections by firmly tightening all terminal screws. Make sure there is no exposed bare wire anywhere.
- Place a cover plate over the RV outlet once all wiring is complete and double check your work for accuracy and safety.
Remember to always consult an experienced electrician if you are unsure about any aspect of this project or if you are in doubt about the wiring procedure. Moreover, ensure to follow all local building codes and regulations when performing any type of electrical work.
With the proper precautions in place, your next RV trip can be worry-free!
Useful Video: 50 Amp RV outlet install, new building updates!
Conclusion
Wiring a 50 amp RV plug is not as difficult as it may seem. With the right tools and supplies, you can easily complete this project in a few hours. Make sure to double check your connections before you test the outlet for power. If everything is wired correctly, you will have successfully created an outlet specifically designed to handle larger loads than standard residential outlets.
Now you are ready to start using it for all of your camping needs! Enjoy the convenience and safety of being able to hook up directly to shore power without having to worry about tripping breakers or creating unsafe conditions. Have fun and happy camping!
References
- https://www.thervgeeks.com/50-amp-rv-plug/
- https://maliasmiles.com/how-to-wire-a-50-amp-rv-plug-outlet/
- https://koa.com/blog/30-vs-50-amp-rv-service/
- https://crowoutdoors.com/what-size-wire-for-50-amp-rv-service/
- ttps://www.rvtechmag.com/electrical/chapter3.php