Welcome to our comprehensive guide on the installation of cable operated RV dump valves. Installing a dump valve is one of the most important steps in maintaining your recreational vehicle and ensuring that it functions properly. In this guide, we’ll provide answers to frequently asked questions as well as useful tips for a successful installation. Let’s get started!
Table of Contents
Why do I need a cable-operated RV dump valve?
A cable-operated RV dump valve is essential for safely and efficiently disposing of waste from your recreational vehicle. It’s important to have a properly functioning dump valve that is regularly maintained in order to prevent clogging, malfunctions, or other issues. [2]
How to Install Cable Operated RV Dump Valve?
Cleaning of the tanks
Before beginning the installation, it is important to ensure that your tanks are clean and free from debris. To do this, use a pump-out system to remove any waste water or solids in the holding tank. Make sure to wear protective equipment when handling waste material.
Once you’ve ensured that the tank is empty and free from debris, you can begin the installation process. [1]
Discard the underbelly wrapping
The underbelly wrapping, also known as the belly band, is located underneath your RV. It is important to discard this before installing the cable operated RV dump valve as it can interfere with the process. Start by removing any screws that are holding it in place and gently unwrap it until you’ve removed all of the material. [1]
Once this is completed, you can begin the installation process.
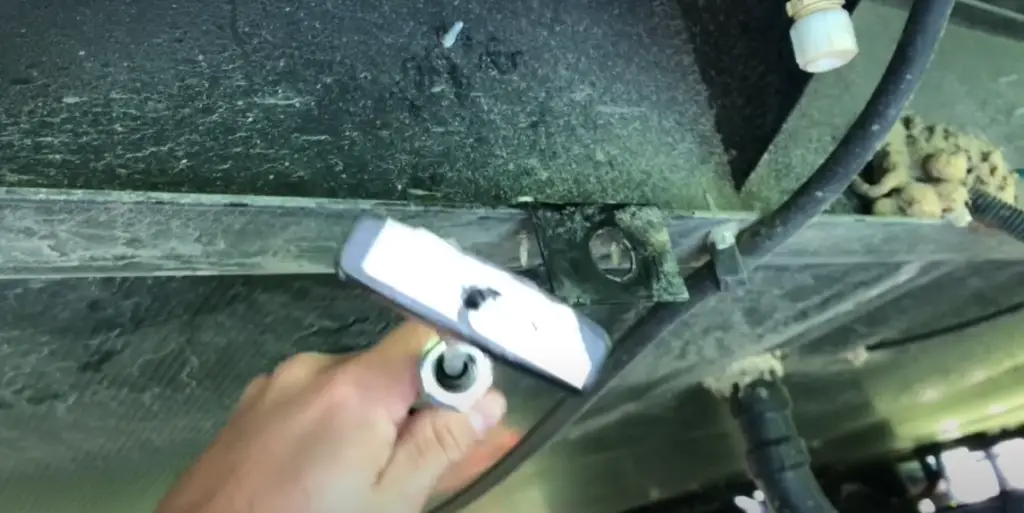
Establishment of flanges
The dump valve will be connected to two flanges. These are pipes that are used to connect the tank and the sewer system. It is important to ensure that these flanges are firmly secured before attaching the dump valve. Use a wrench or other tools to tighten the screws, making sure that all of them are secure. [1]
Once this is completed, you can continue to the next step of installation.
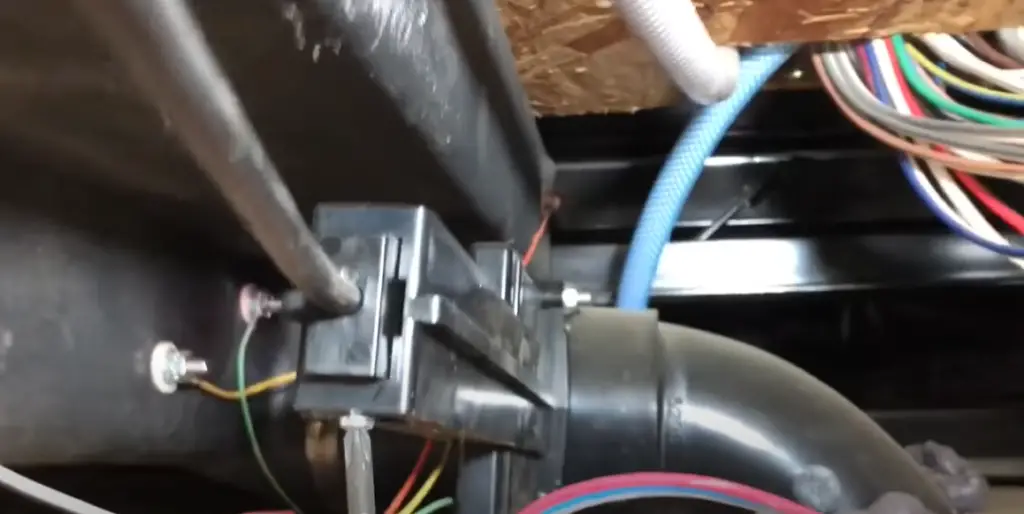
Connecting the wiring of valves
The dump valve has two wires, a red and a black. Connect the black wire to one of the flanges, and then connect the red wire to the other flange. This will ensure that the dump valve is properly connected and ready for use. Once this is completed, you can move onto connecting the cable. [1]
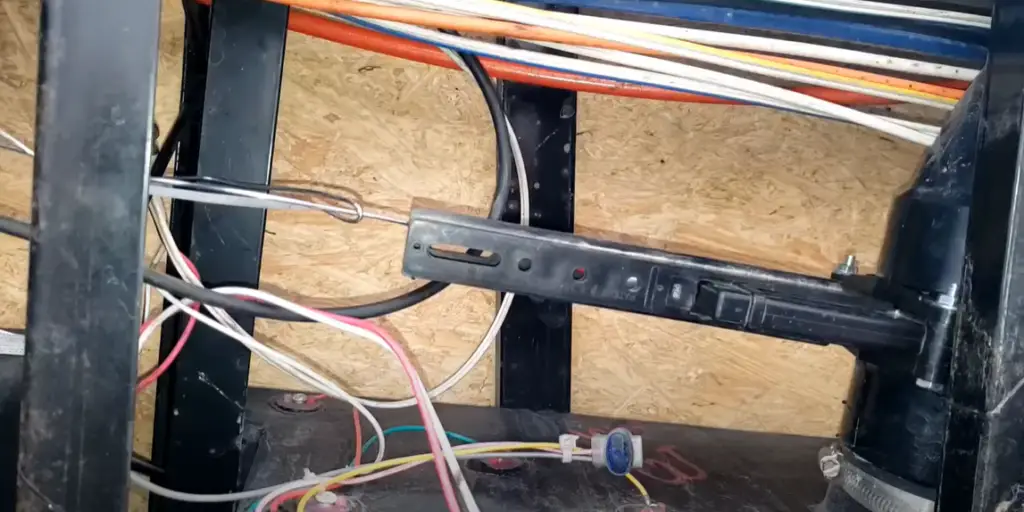
Checking the process of installation
Once you have installed the cable operated RV dump valve, it is important to check that everything is working properly. To do this, open the dump valve and make sure that it opens and closes smoothly. If there are any issues with the installation process or if something isn’t working correctly, contact a professional for assistance. [1]
Benefits of cable-operated RV dump valve
Increase the convenience
Cable-operated RV dump valves provide many benefits compared to manual valves, especially when it comes to convenience. Cable-operated valves are much easier to operate than manual valves, and they can be installed quickly and easily with minimal tools or expertise. Additionally, some models feature automatic shutoff mechanisms that will prevent accidental overfilling or overflows.
This type of valve also requires minimal maintenance, as the only moving parts are the cables and seals, which can be replaced easily if they wear out. Finally, cable-operated RV dump valves are designed to withstand extreme weather conditions, so you don’t have to worry about them freezing up in cold temperatures or rusting in wet climates. [1]
Indicators presence
Many models of cable-operated RV dump valves come with indicators that can alert you when the valve is open. This is especially useful for remote locations where you may not be able to monitor the valve’s operation from a distance. The indicators are typically bright and visible, so you’ll know at a glance if the valve is open or closed.
Additionally, indicators can be used to gauge the amount of water that has been dumped in a given time period. This is beneficial for campers who are trying to conserve water, as they can ensure that their RV tank isn’t overflowing. [1]
Tips for using your new cable-operated RV dump valve
- Make sure you are in a well-ventilated area before beginning the installation process. Installing your new RV dump valve can release harmful fumes that can cause health problems if inhaled for too long.
- Before attaching the cable to your RV’s sewer fitting, make sure that the spring is firmly in place. Properly secure the spring to ensure it will not come loose during operation.
- Always wear protective eyewear and gloves when installing your RV dump valve as you are dealing with potentially hazardous materials.
- Make sure that all bolts, nuts, and screws are securely tightened before testing your new RV dump valve for the first time.
- Always test your RV dump valve before each use to make sure everything is working properly and there are no leaks or other issues.
- Keep the area around the RV dump valve clear of any debris or objects, as this can cause it to malfunction during operation.
- Make sure that all hoses and fittings are securely fastened to the RV dump valve before each use.
- When using your RV dump valve, always check for any leaks or signs of wear and tear before you disconnect the cable from the sewer fitting.
- If you notice any kind of damage, be sure to replace it immediately as this could lead to leaks or other issues.
- Lastly, it is important to keep the RV dump valve clean and free of debris to ensure its proper operation and longevity. Cleaning your RV dump valve regularly will help prevent any clogs or blockages that could cause dangerous malfunctions. [2]
FAQ
How does an RV dump valve work?
An RV dump valve is a convenient way to open and close the tank valves on your recreational vehicle (RV). The RV dump valve has a cable connected to a handle that can be easily operated from inside or outside of the RV. The cables connect to two valves, one for gray water and another for black water. The gray water valve is usually at the rear of your RV and the black water valve can be anywhere from the bottom to the top.
How do you lubricate RV dump valve cables?
To ensure the RV dump valve cable operates smoothly and lasts for a long time, it is important to regularly lubricate it. The best way to do this is to use mineral oil or silicone-based lubricant spray. Make sure you spray some of the lubricant onto the cables as well as into the holes where they connect. This should help the cables move smoothly, keeping them from sticking or becoming too tight.
Where is the dump valve on an RV?
The RV dump valve is usually located at the rear of your recreational vehicle. You will find two valves, one for gray water and another for black water. The cable connected to the handle should be routed from inside or outside of your RV to reach these valves.
Where do you put a dump valve?
The best place to install an RV dump valve is at the rear of your recreational vehicle. This will ensure that the cables can be easily reached from inside or outside of your RV. When installing the dump valve, make sure you route the cables away from any potential sources of heat and direct sunlight as much as possible.
Can I leave my RV dump valves open?
No, it is not recommended to leave your RV dump valves open for extended periods of time. This can cause damage to the valves and lead to leaks or other issues with the tank. If you need to keep your dump valves open for any length of time, make sure you monitor them closely and close them as soon as possible.
Are dump valves illegal?
No, dump valves are perfectly legal in most locations. However, it is important to check with your local laws and regulations before installing a dump valve on your RV. Additionally, be sure to follow all safety protocols when using the dump valve, such as keeping an eye on the cables and closing the valves promptly after use.
Are dump valves safe?
Yes, dump valves are generally safe to use as long as they are properly installed and maintained. Be sure to inspect the cables and handle regularly to make sure everything is in good working order. Additionally, always keep an eye on the cable while it is being operated and follow all safety protocols when using the dump valve.
Does a dump valve affect performance?
No, a dump valve does not typically have an effect on the performance of your RV. However, if it is not properly installed or maintained, it can lead to leaks or other issues with the tank. Be sure to inspect and lubricate the cable regularly to ensure everything is in working order. Additionally, be sure to close the valves promptly after use and keep an eye on the cable while it is being operated.
Does a dump valve increase power?
No, a dump valve does not typically increase the power of your RV. However, it can help to keep your tanks from overflowing and keep your recreational vehicle running smoothly for longer periods of time. Additionally, be sure to inspect and lubricate the cable regularly to ensure everything is in working order.
Is it worth putting a dump valve on a diesel?
Yes, it is definitely worth putting a dump valve on a diesel engine. This can help to keep your tank from overflowing and ensure smoother operation for longer periods of time. Additionally, be sure to inspect and lubricate the cable regularly to ensure everything is in working order.
Finally, it is important to follow all safety protocols when using the dump valve, such as keeping an eye on the cables and closing the valves promptly after use. Doing so will help to keep your RV running smoothly and efficiently for years to come.
Useful Video: RV waste valve cable replacement
Conclusion
Installing a cable operated RV dump valve is not as difficult or complex as it might seem. With patience and the right tools, most people can easily install one of these valves in their own vehicle. It’s also important to remember that if you are not comfortable with the installation process, there are professionals that can help you out. It’s always best to consult a professional if you feel like something is not going right during the installation process.
Finally, don’t forget that it’s important to regularly check your cable operated RV dump valve for any signs of wear and tear or damage that could potentially lead to an unwanted leak in your system. If you take the time to do regular maintenance on your valve, it could help save you from having a major problem in the future.
We hope this article has been helpful and that it has provided some useful tips for how to install cable operated RV dump valve. With the right tools and a bit of patience, anyone can easily install one of these valves. Good luck and happy RVing!
References:
- https://trucksauthority.com/how-to-install-cable-operated-rv-dump-valve/
- https://www.rvcampgear.com/how-to-install-cable-operated-rv-dump-valve/