It’s that time of year again! The weather is getting warmer, and it’s time to start thinking about dewinterizing your RV. This can be a daunting task, but don’t worry – we’re here to help! In this article, we will discuss the common questions people have about dewinterizing their RVs, as well as some useful tips to make the process go smoothly. Let’s get started!
Table of Contents
When Should I Dewinterize my RV?
If you live in an area with a mild climate, you may be able to get away with dewinterizing your RV later in the season. However, if you’re planning on taking your RV into colder climates, it’s best to do it sooner rather than later. [1]
How Do I Dewinterize My RV?
There are a few steps that you need to take in order to properly dewinterize your RV. We’ve outlined them for you below:
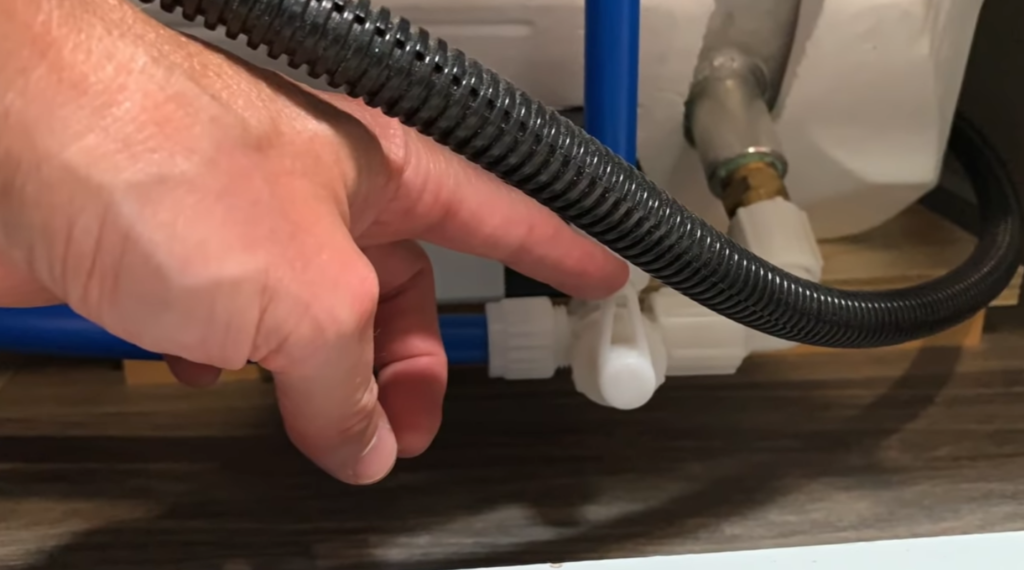
- Drain the antifreeze from your RV’s plumbing system. This can be done by opening all the faucets and drains in your RV, and then flushing the system with clean water.
- Clean out your RV’s fresh water tank, and add fresh water to it. Be sure to also clean out your RV’s hot water heater.
- Inspect your RV’s tires for any cracks or damage. If you find any, be sure to have them repaired or replaced before taking your RV on the road.
- Test all the appliances in your RV to make sure they’re working properly. This includes your furnace, stove, oven, fridge, and more.
Dewinterizing Your RV Exterior
It’s finally spring! And for many of us, that means it’s time to start thinking about getting our RVs ready for another season of fun. But before you can hit the open road, there’s one important task that needs to be taken care of first: dewinterizing your RV.
If you’re not sure where to start, don’t worry. So whether you’re a first-time RV owner or a seasoned pro, read on for some helpful tips on how to get your rig ready for another season of adventure.
First things first: what exactly is dewinterizing? In short, it’s the process of getting your RV ready for warmer weather after it’s been stored during the winter months. This generally involves a few key steps, like flushing out the water system, checking the tires and batteries, and giving the interior and exterior a good cleaning.
So why is dewinterizing so important?
For example, if you don’t flush out the water system correctly, you could end up with nasty bacteria growing in your pipes. And if you don’t check your tires and batteries before hitting the road, you could find yourself stranded on the side of the. Trust us, neither of those scenarios are fun.
Getting Your RV Battery Road Ready
The first thing you’ll need to do is get your RV battery road ready. You’ll want to make sure it’s clean and free of corrosion. You can do this by using a battery brush and some distilled water. Once you’ve cleaned the terminals, you’ll want to apply a thin layer of petroleum jelly. This will help keep the corrosion away.
Next, you’ll need to check the fluid levels in your RV battery. If they’re low, you’ll need to add more distilled water. Be careful not to overfill the cells, as this can damage the battery.
Once you’ve checked the fluid levels and cleaned the terminals, you’ll need to recharge your RV battery. You can do this by plugging it into an electrical outlet or by using a solar charger.
Once your RV battery is road ready, you can move on to the next step: dewinterizing your RV plumbing.
How to Reinstall Your Battery
After you’ve removed your battery from storage, it’s time to reinstall it. This process is pretty simple, but there are a few things to keep in mind.
First, make sure that the battery is properly secured. You don’t want it bouncing around while you’re driving! Second, take a moment to clean the terminals. This will help ensure that your electrical connections are good and strong.
Once your battery is back in place, it’s time to reconnect all of your RV’s electrical systems. Start by turning on the main switch (usually located near the front of the RV). Then, turn on each individual system one at a time. Make sure to test everything before hitting the road!
How to Charge Your RV Battery
After a long winter of inactivity, your RV battery is going to need a little help getting back up to full power. The best way to do this is to hook it up to an external charger and let it charge for at least 24 hours.
Once the battery is charged, you can move on to the next step: flushing out the plumbing system. This is important because over time, stagnant water can start to build up bacteria that could make you sick. To flush the system, simply turn on all the faucets and let them run until the water runs clear.
Top Off Your Battery Water Levels
If your RV has been sitting all winter, it’s likely that the battery water levels have gone down. Before you can start using your RV again, you’ll need to top off the water levels in your batteries. You can do this by removing the caps and adding distilled water until the battery is full.
Once you’ve topped off the battery water levels, you’ll need to charge the batteries. You can do this by plugging your RV into a power source or by using a portable generator. Once the batteries are charged, you’ll be ready to use your RV again!
Checking Your RV Tires
The first thing you’ll want to do is check your RV tires. If they look flat, or if you see any cracks, it’s time for new ones. Even if they don’t look bad, it’s a good idea to get new tires every few years to be safe.
Once you have new tires, you’ll want to check the air pressure in them. The correct pressure will be listed on the side of the tire. Be sure to check all four tires, even if only one looks low.
It’s also a good idea to invest in tire covers. These will protect your tires from the sun and other elements when you’re not using your RV. They’re especially important if you live in an area with hot summers.
Tire covers can be purchased at most RV stores, or online. Be sure to get ones that fit your tires snugly. You don’t want them to be too loose, as they could blow off in strong winds. [2]
Dewinterizing Your RV Interior
Now that you’ve taken care of the outside of your RV, it’s time to focus on the interior. The first thing you’ll want to do is give everything a good cleaning. This includes dusting, vacuuming, and scrubbing any surfaces that need it. If you have carpeting, you may want to shampoo it as well. Once everything is clean, you can start opening up windows and doors to let fresh air in.
Next, you’ll need to check all of your appliances and systems to make sure they’re in working order. This includes your furnace, water heater, refrigerator, stove, oven, and bathroom fixtures. Make sure to test them all out before using them for the first time after winter.
Finally, you’ll want to restock your RV with all the supplies you need for a successful camping trip. This includes food, water, propane, and any other essentials. Now that you’ve dewinterized your RV, it’s time to hit the open road!
Dewinterizing Your RV Plumbing
If you’re like most people, you probably don’t give your RV’s plumbing much thought – until something goes wrong. Then, it’s all you can think about!
RV plumbing is a pretty simple system, but there are a few things you need to know in order to keep it running smoothly. Here are some tips for dewinterizing your RV plumbing:
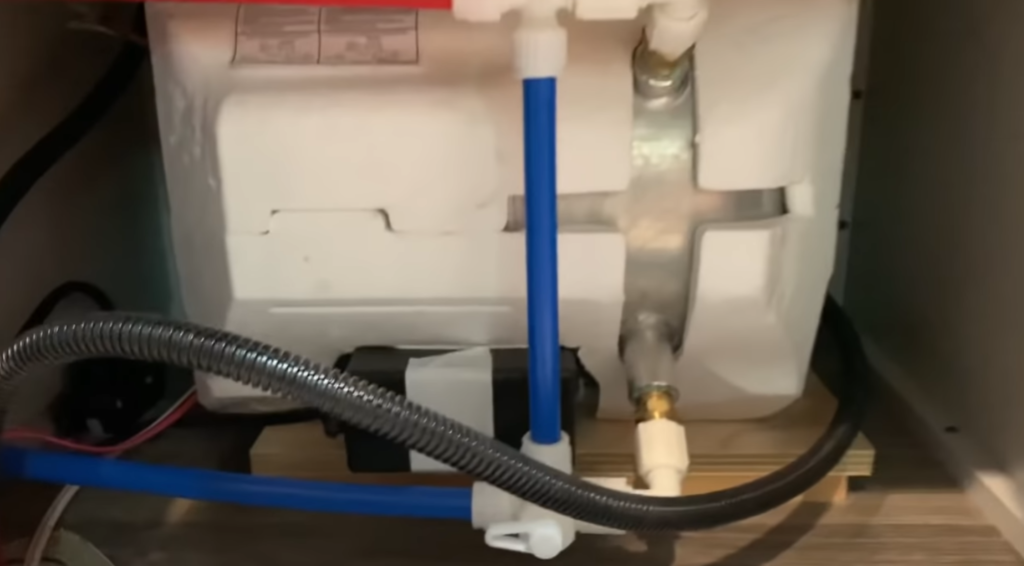
- Drain the fresh water tank and add RV antifreeze. This will prevent the water lines from freezing and bursting during the winter months.
- Disconnect the city water connection and drain the line. This will keep any residual water from freezing and causing damage to your pipes.
- Winterize your grey water tank by adding RV antifreeze. This will keep the sewage from freezing and causing a nasty mess.
Remove the RV Antifreeze
One of the most important steps in dewinterizing your RV is to remove all of the antifreeze from the system. To do this, you’ll need to:
- Locate all of the low point drains on your RV and open them up
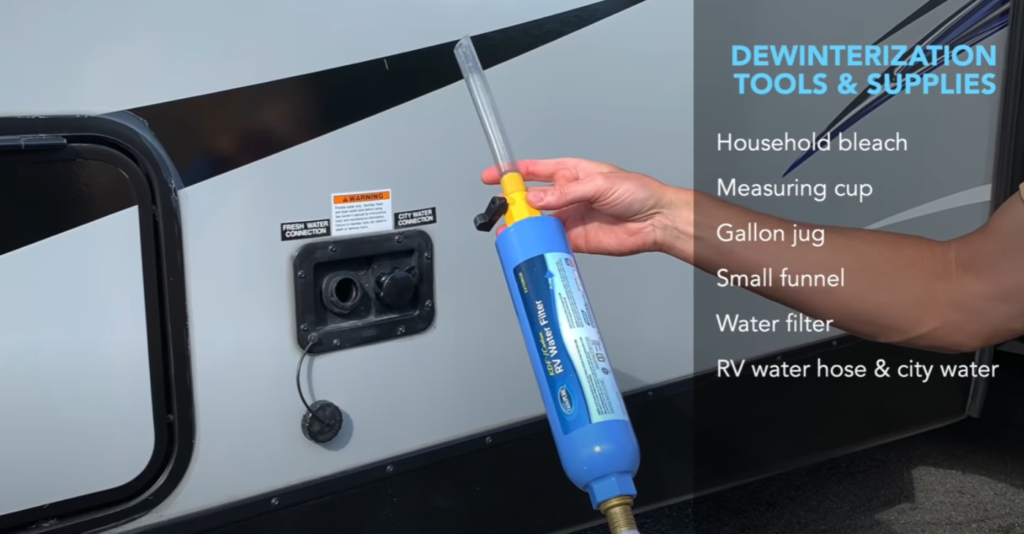
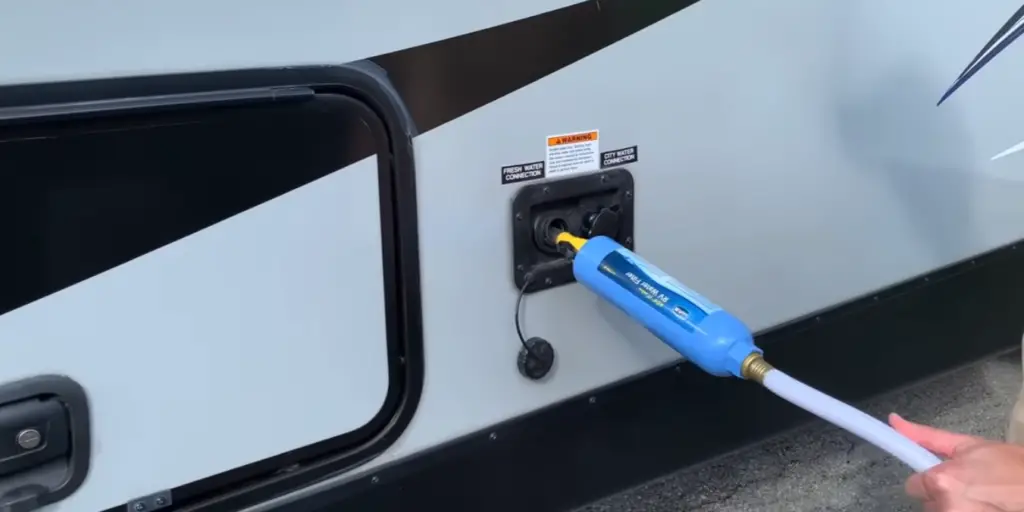
- Hook up a garden hose to your fresh water inlet and flush out all of the lines
- Run every faucet, shower, and toilet in your RV until you can no longer smell antifreeze
- Refill your fresh water tank with clean water
- Close all of the low point drains.
Sanitize Your Fresh Water System
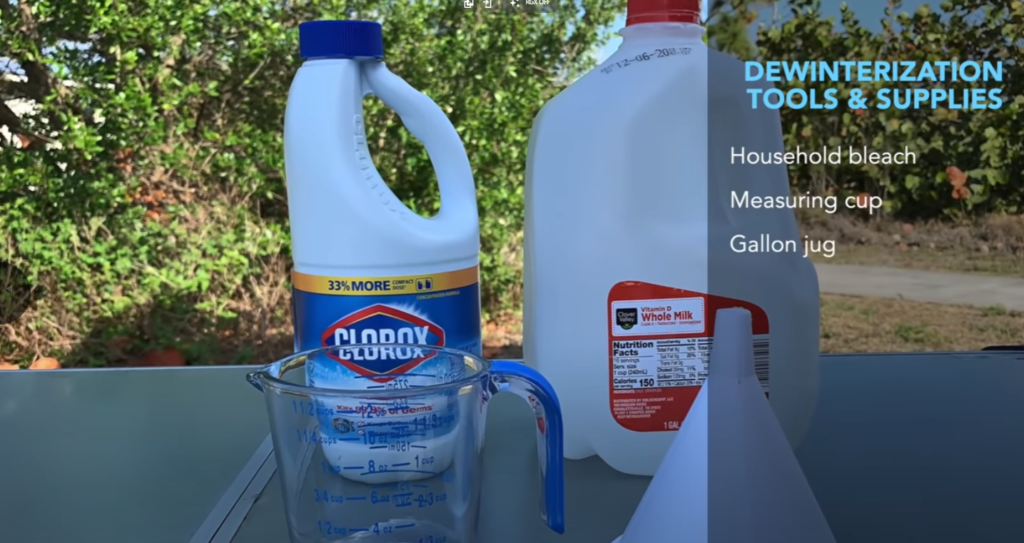
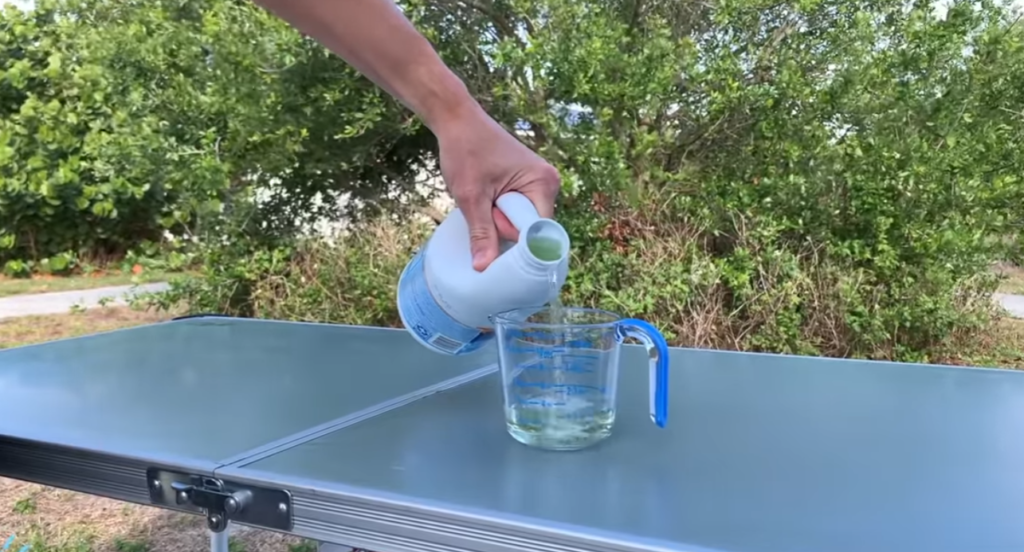
Fill your fresh water tank and add a sanitizing solution. The amount of sanitizer you’ll need will depend on the size of your tank. Follow the package directions for how much to use. Once you’ve added the sanitizer, turn on all the faucets in your RV (including any outside showers) and let them run until you can smell the sanitizer at each outlet.
Afterwards, drain your fresh water tank and refill it with clean water. Run the faucets again until they only dispense clean water.
If you have a hot water heater, now is also a good time to flush it out. To do this, open all the hot water taps in your RV and turn on the electric heating element (or light the pilot light if you have a gas water heater). Let the water run until it’s hot, then turn off the heat and let the tank cool completely. Drain the tank and refill it with fresh water.
Refill Your Water Heater
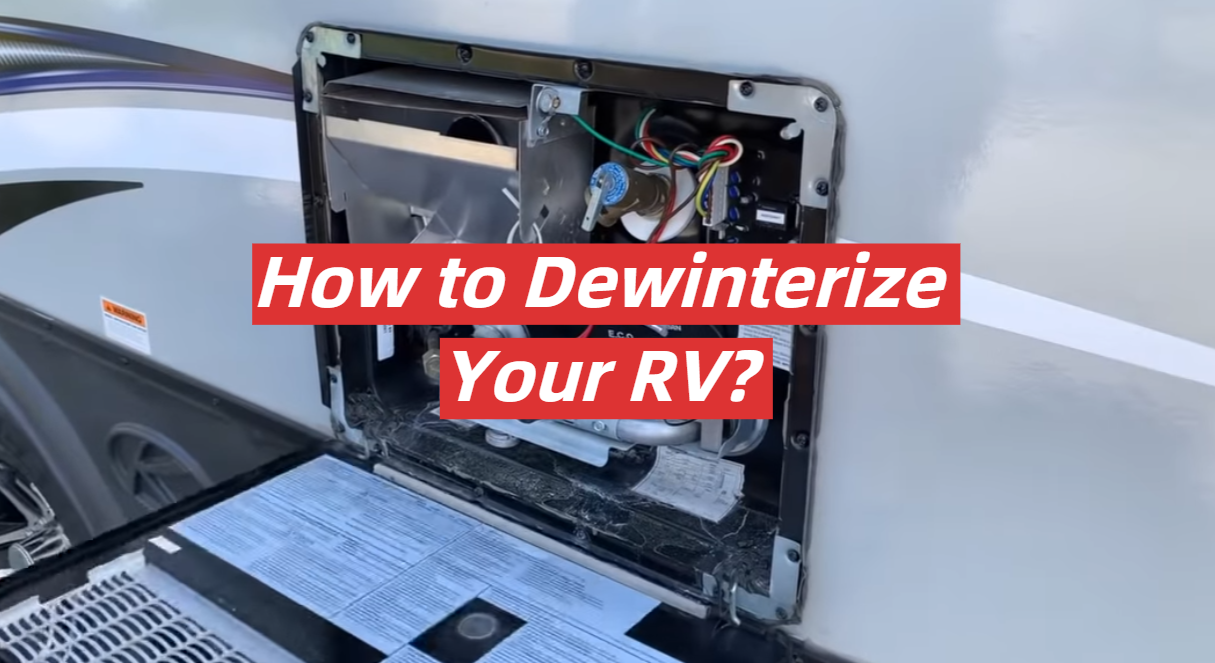
The first thing you’ll want to do is refill your water heater. You can do this by opening the pressure relief valve and turning on the cold water supply. Next, open all the faucets in your RV to bleed air from the lines. Once the water heater is full, close all the faucets and turn off the cold water supply.
Now that your water heater is refilled, it’s time to add antifreeze. To do this, open the drain plug at the bottom of the unit and let some of the water drain out until you see pink antifreeze coming out. Close the drain plug once you’ve added enough antifreeze.
Check for Leaks
The first thing you’ll want to do is check your RV for any leaks or cracks.
Another thing you’ll want to check is the condition of your tires. If they’re looking worn, it’s probably time to get new ones. This is especially important if you’re going to be doing any traveling.
Once you’ve checked for leaks and cracks, and made sure your tires are in good shape, you can start dewinterizing your RV. [3]
Checking Your RV Propane Tanks
One of the first things you’ll want to do when dewinterizing your RV is to check your propane tanks. You’ll want to make sure that they’re full and that there are no leaks. If you find any leaks, you’ll need to repair them before using your RV.
Another thing to check is the condition of your hoses and connections. Make sure there are no cracks or leaks in them. If there are, you’ll need to replace them before using your RV.
Testing Your RV Appliances
After you’ve given your RV a good cleaning, it’s time to test out all the appliances. Start by turning on the water pump and running all the faucets to get rid of any air in the lines. Then, flush the toilet and check for any leaks. Next, turn on the stove top burners and oven to ensure they’re working properly. Finally, plug in your TV and any other electronics to ensure they’re getting power.
Once you’ve gone through all your RV’s systems and everything is working properly, you can start planning your first trip of the season!
How to Check Your Generator
Here are a few things to check:
- Check the oil level and change it if necessary.
- Check the air filter and clean or replace it if needed.
- Check all the hoses and connections for leaks.
- Test the battery and charging system.
If everything looks good, then you’re ready to start your RV’s engine and let her rip! Just kidding – be sure to follow all manufacturer’s instructions when starting up your RV after winter storage.
Safety Systems
Your RV has been sitting all winter, so it’s important to check all the safety systems before taking it out on the road. Here are some things to check:
- The brakes and tires: Brakes can seize up from disuse, so it’s important to test them before hitting the road. Tires can also degrade over time, so it’s a good idea to inspect them for any cracks or damage.
- The battery: Make sure the battery is fully charged and in good condition. A dead battery is one of the most common causes of breakdowns.
- The propane system: Check for any leaks in the propane lines and make sure all connections are tight. Propane is highly flammable, so it’s important to ensure everything is in good working order.
These are just a few of the things you should check before dewinterizing your RV. For a more complete list, consult your owner’s manual or a qualified mechanic.
Dewinterizing Your Motorized RV
If your RV has been sitting all winter, it’s time to get it ready for spring and summer road trips! This process is called dewinterizing, and there are a few key steps you’ll need to take to make sure your RV is in top shape. Here’s a quick guide on how to dewinterize your motorized RV:
The first step is to check all of the fluid levels. This includes the engine oil, transmission fluid, coolant, and brake fluid. If any of these fluids are low, top them off. You should also check the condition of the hoses and belts – if they’re cracked or frayed, replace them.
Next, you’ll need to inspect the tires. Check the tread and pressure, and if they’re looking worn, consider replacing them. It’s also a good idea to check the brakes and wheel bearings. If everything looks good, you’re ready to hit the road!
Dewinterizing Your Towable RV
The process of dewinterizing your towable RV is relatively simple and can be done in a few hours. The most important thing is to make sure all the systems in your RV are functioning correctly.
- Start by giving your RV a thorough cleaning, inside and out for removing any dirt or debris that may have accumulated over the winter months.
- Next, check all the fluid levels in your RV – engine oil, coolant, transmission fluid, etc. – and top them off if necessary.
- Inspect all the tires on your RV for any signs of wear or damage. If they look okay, inflate them to the proper pressure.
- Finally, take your RV for a test drive to make sure everything is working properly.
What You Need to Dewinterize Your RV
To get started, you’ll need to gather a few supplies. You’ll need RV antifreeze, fresh water, a clean towel, and a hose. If you have an air compressor, that will come in handy as well. If not, you can rent one from most hardware stores.
The first step is to open all the faucets in your RV and run the water until it’s clear. This will help flush out any residual antifreeze that may be left over from winterizing. Next, turn off the main water supply to your RV.
Now it’s time to start adding fresh water to your system. Fill up your freshwater tank and then open the valves to start circulating the new water throughout your RV. Once the new water is running through all the lines, turn on the faucets and flush each one until the water runs clear.
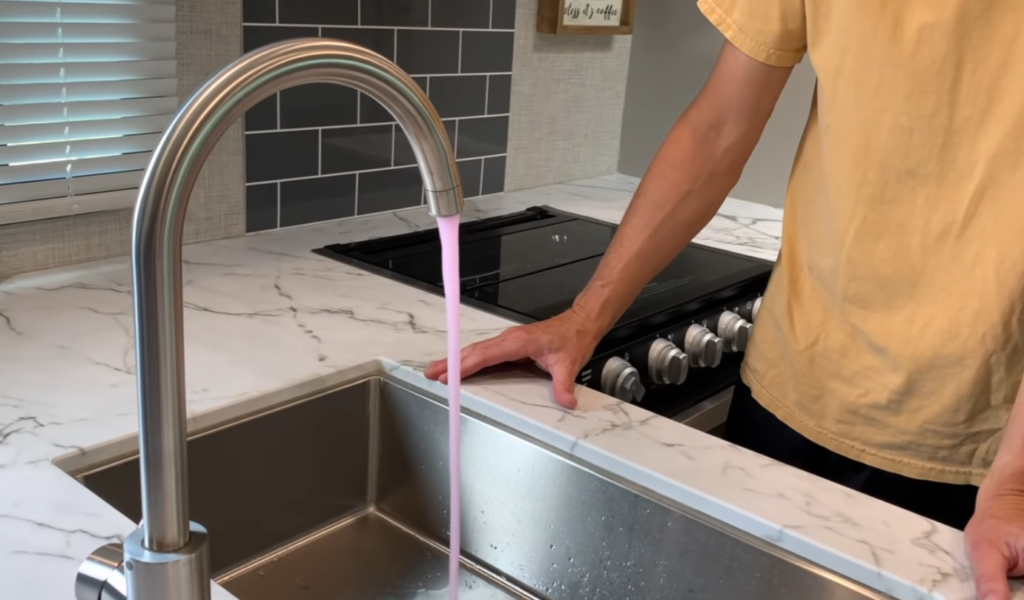
Now that your RV’s fresh water system is up and running, it’s time to add some antifreeze. This will help protect your pipes from freezing in case of a cold snap. To do this, simply open all the faucets in your RV and add antifreeze to each one.
Once you’ve added antifreeze to all the faucets, it’s time to move on to the drains. Pour a generous amount of antifreeze down each drain, including the shower drain and toilet. This will help prevent any residual water from freezing in the pipes. [4]
The last step is to add antifreeze to your RV’s holding tank. This will help keep your black and gray water tanks from freezing and bursting. To do this, simply pour antifreeze into the toilet and then flush it a few times. You can also add antifreeze to the holding tank through the overflow valve.
FAQ
How do you flush antifreeze out of an RV?
The process of flushing antifreeze out of an RV is pretty simple. You’ll need to connect a fresh water hose to the city water connection on your RV and then open all the faucets, including any outside showerheads, until you see pinkish-colored water coming out. At that point, you can close the faucets and disconnect the hose.
It’s important to note that you should never use a garden hose to flush antifreeze out of your RV because it can contaminate your drinking water supply. If you don’t have access to a fresh water hose, you can buy one at most hardware stores or online. [5]
Once you’ve flushed the antifreeze out of your RV, you’ll need to refill the fresh water tank with clean water. You can do this by connecting a hose to a spigot or water source and then opening the fill valve on your RV until the tank is full.
After the fresh water tank is full, you’ll need to run all the faucets in your RV again for a few minutes to flush out any remaining antifreeze. Once that’s done, you can close all the faucets and disconnect the hose.
Your RV is now ready for use!
How do you Dewinterize an RV with antifreeze?
The most important thing to do when dewinterizing your RV is to make sure all the water lines are clear of any antifreeze. To do this, you’ll need to flush out the entire system with fresh water.
To start, open all the faucets in your RV and run the water until it becomes clear. Then, turn on the water heater and let it run for a few minutes before draining it completely. [6]
Once all the lines have been flushed, you can add fresh water to the tanks and fill up any other reservoirs like the toilet holding tank. Now your RV is ready for another season of adventure!
How do you un-winterize a camper?
The process of un-winterizing an RV is pretty simple, but there are a few things you need to do to make sure everything goes smoothly. Here’s a quick rundown of what you need to do:
- Start by giving your RV a good cleaning. This will help get rid of any dust or dirt that may have accumulated over the winter months.
- Next, check all of your fluids and make sure they are at the correct levels. This includes your engine oil, coolant, and transmission fluid.
- Now it’s time to check your tires. Make sure they are properly inflated and that there is no excessive wear or tear.
- Finally, give your RV a test run to make sure everything is working properly.
By following these simple steps, you’ll be sure to have a successful un-winterizing experience. So don’t wait any longer, get out there and enjoy the great outdoors!
How do you Dewinterize?
Dewinterizing your RV is a process of taking all the steps necessary to prepare your home on wheels for warmer weather. This usually includes tasks like draining the antifreeze from the plumbing lines, opening up any vents or skylights that were closed for the winter, and giving the interior a thorough cleaning.
Depending on how well you winterized your RV in the first place, some of these tasks may be more involved than others.
Useful Video: RV Tips – How to de-winterize your trailer
Conclusion
As the weather starts to warm up, it’s time to start thinking about taking your RV out of storage and getting back on the road. But before you do, there are a few things you need to do first – namely, dewinterizing your RV.
Dewinterizing your RV is an important part of owning one. By taking the time to do it right, you’ll ensure that your home on wheels is ready for whatever spring and summer have in store.
We hope you found this guide helpful! If you have any questions or tips of your own about how to dewinterize your RV, please share them with us in the comments below. And if you’re looking for more great information and resources about all things RVing, be sure to check out our blog, The RV Atlas. Happy travels!
References
- https://togorv.com/rv-living/how-to-dewinterize-your-rv/
- https://koa.com/blog/get-your-rv-ready-for-spring/
- https://www.rv.com/servicing-care/how-to-perform-an-rv-tire-inspection/
- https://www.generalrv.com/blog/how-to-dewinterize-your-rv-for-camping-season/
- https://rollinontv.com/how-to-de-winterize-and-sanitize-the-rv-water-system/
- https://www.latchit.org/post/rv-de-winterization

Leave a Reply