Are you tired of constantly struggling to climb onto the top bunk of your RV’s bunk bed? Well, look no further because we have the ultimate solution for you! This comprehensive guide will walk you through the step-by-step process of constructing a sturdy and practical bunk bed ladder specifically designed for your RV. Say goodbye to wobbly ladders and awkward shuffles up the bed; with these expert tips and tricks, you’ll be on your way to a comfortable and safe sleeping experience in no time. So, roll up your sleeves and get ready to embark on a DIY adventure that will transform your RV bunk bed into the ultimate cozy nest.
Table of Contents
Main purposes of a bunk bed ladder in RV
A bunk bed ladder in an RV serves several purposes. Firstly, it provides a safe way of accessing the upper bunk while simultaneously making the most out of the limited space available. Secondly, it makes getting up and down from the top bunk much easier and more comfortable, providing an extra layer of security when sleeping or performing other activities in the upper bunk. Finally, a bunk bed ladder can also add a decorative touch to the RV, giving it an inviting and homely feel.
Furthermore, RV ladders can add a layer of safety to the bed area when camping with children. The ladder’s sides provide a physical barrier that helps to keep kids safe in their beds while allowing them enough space to move around freely and comfortably.
In conclusion, RV bunk bed ladders provide a stable and secure way to access the upper bunk, while simultaneously freeing up valuable space for other uses. They are also easy to install and remove when needed, making them an ideal choice for anyone who wants the convenience of an extra sleeping area in their RV without having to sacrifice safety or style.
Using Wood Material To Build The Ladder
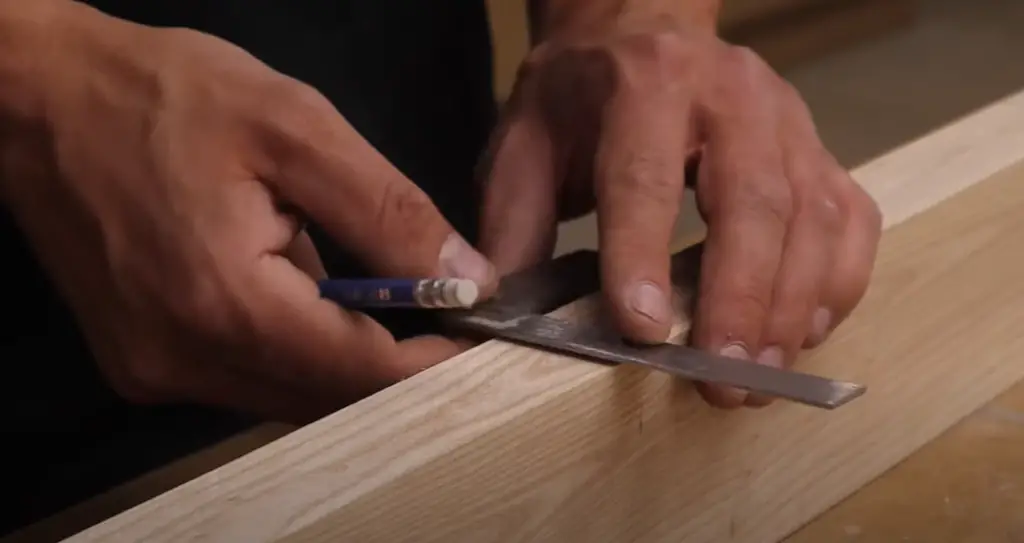
Step 1: Confirm The Slope Of The Ladder
Before you start working on your RV bunk bed ladder, make sure to measure the slope of the ladder. It’s important to determine how much angle your wooden ladder should have for it to be properly supported and safe for use. This can be done by measuring from the top step to the bottom step of your RV bed. You will then need to transfer this measurement onto the pieces of wood for your ladder.
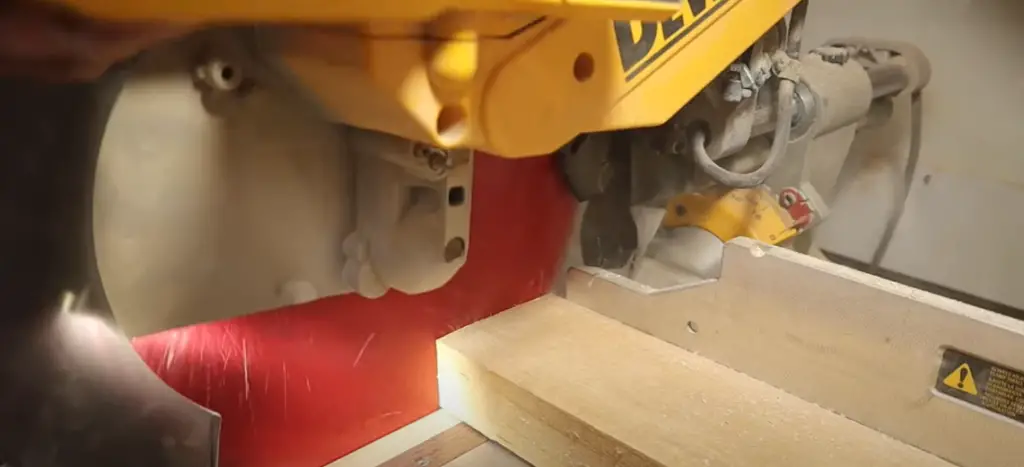
Step 2: Designs The Bottom Of Ladder Sides
Using a sturdy saw, carefully cut two pieces of high-quality wood for the ladder sides. Be sure to measure the exact distance between the steps and add an extra inch to ensure a perfect fit. These precisely crafted pieces will form the solid and reliable foundation of your comfortable and practical RV bunk bed ladder.
Step 3: Design The Tops Ladder Sides
To construct the upper section of the ladder, it is advisable to cut two pieces that are slightly shorter than the bottom pieces. This adjustment takes into consideration the slope that was measured in Step 1, ensuring a precise fit. Additionally, it is recommended to thoroughly sand all surfaces of the ladder components before assembling them together. This meticulous preparation will contribute to a smoother and more durable final product.
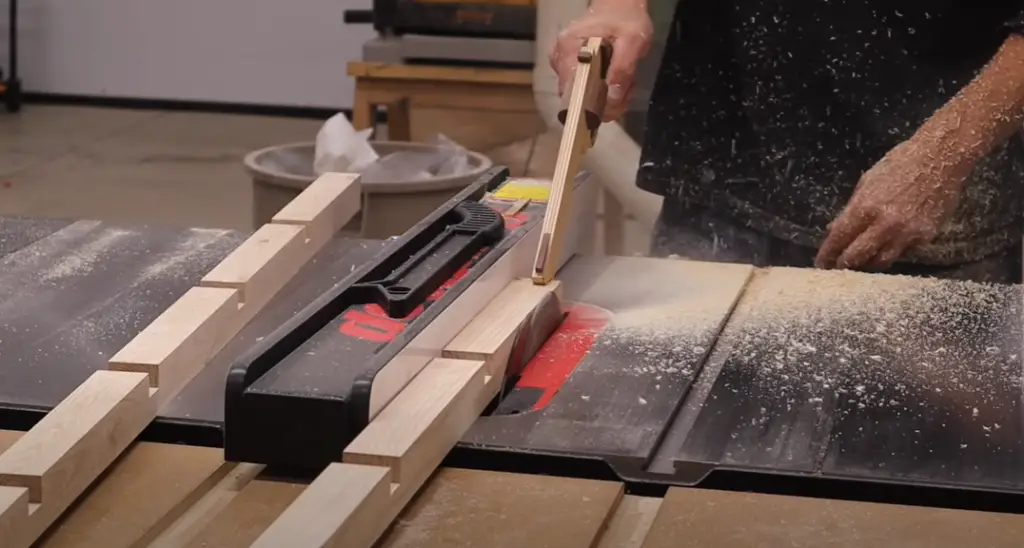
Step 4: Design The Rungs or Steps
To ensure a safe and secure ascent up the ladder, it is recommended to saw several pieces of wood that are slightly shorter than the bottom and top sections. This will provide a sturdy foundation for each step. Depending on your preferred spacing between each step, take the time to carefully sand these components. By doing so, you will create a smooth and comfortable surface for your feet, enhancing your overall climbing experience. Follow these steps diligently, and you’ll be well-equipped for a successful and confident climb.
Step 5: Drill The Pilot Holes
For a stronger and more durable ladder, it is highly recommended to take the time to drill pilot holes into each piece of wood. This meticulous step allows for precise alignment when driving in screws or nails later on, ensuring a secure and stable structure. It is crucial to consider the size of these holes and ensure they match the width of your chosen fasteners, as this will further contribute to the overall strength and longevity of the ladder. By paying attention to these details during the construction process, you can have confidence in the reliability and safety of your ladder for years to come.
Step 6: Set Wood Screws and Nails
Once all the pilot holes have been drilled into each piece, it’s time to secure the components together with nails or wood screws. This can be done by driving them in one at a time, taking care to align them correctly with the previously made pilot holes. Tighten each fastener gradually and securely to ensure a reliably tight fit that will last for years to come.
Step 7: Apply Primer And Paint
For a professional-looking finish on your RV bunk bed ladder, start by sanding the surface to remove any imperfections. Then, apply a high-quality primer to ensure proper adhesion of the paint. Once the primer is dry, choose a paint color that complements your RV’s interior or exterior design. Applying multiple thin coats of paint will result in a smooth and durable finish. Don’t forget to let each coat dry completely before applying the next one. This final step will not only enhance the appearance of your ladder but also make it easier to clean and protect it from various weathering elements, ensuring its longevity and maintaining its aesthetic appeal.
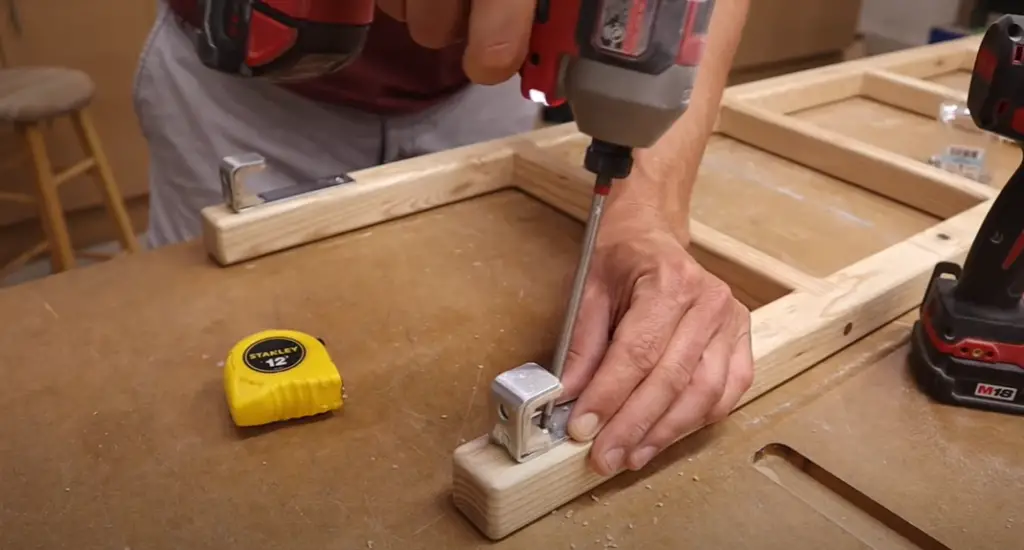
Step 8: Attach Metal Hooks On The Top Of Ladder
For an even more secure and comfortable climb, attach two metal hooks to the top of your ladder. The bottom hook should be secured to the side piece using a bolt or screw while the top hook should be attached to each opposite side panel. This will provide you with a stable handle for improved balance and safety during your ascent.
Step 9: Inspect And Test The Ladder Before Use
Before using your newly constructed RV bunk bed ladder, it’s important to inspect every piece and check for any inconsistencies or poor alignment. Additionally, test the sturdiness of each rung and make sure all of the fasteners are properly tightened. By taking these steps, you will be certain that your ladder is safe for use and won’t pose a risk in terms of accidents or injuries [1].
Using Rope Material To Build The Ladder
RV bunk bed ladders are typically made with lightweight rope material. This material is strong and durable to ensure your safety and the stability of your RV ladder. The rope can also be used for a variety of other purposes such as hanging tools or decorations within your RV. If you find that the length of the ladder exceeds what the rope can support, it may be beneficial to purchase extra rope material from a local hardware store and use it for additional support. When attaching ropes to the ladder, make sure that they are fastened securely with appropriate knots so that the ladder is safe to use.
Once assembled, be sure to inspect your RV bunk bed ladder regularly for any damage or wear and tear. This will help to ensure that it is safe for you to use. If any of the rope material appears worn, frayed, or broken, replace it as soon as possible. Additionally, inspect the ladder for any signs of rust or corrosion which could cause serious safety issues down the line [2].
How to use and maintain a bunk bed ladder in an RV?
Whether you are a frequent traveler or an occasional RV camper, having the right ladder for your bunk beds is essential. Using a bunk bed ladder can be tricky in such small spaces, but it doesn’t have to be. With the proper instructions and maintenance tips, you can ensure that your RV bunk bed ladder is safe and secure.
First, you’ll want to make sure that your bunk bed ladder is the correct size for your RV. You don’t want it to be too long or too short as both can create a dangerous situation. Measure the area where you intend to place the ladder and check the specifications on your ladder before purchasing.
When using the ladder, always wear shoes with non-slip soles to help prevent slippage. Additionally, be sure that the ladder is sturdy and properly secured before climbing up or down. If you are using a collapsible ladder, make sure that it is locked in place before use.
After each road trip, it’s important to inspect your RV bunk bed ladder for any signs of damage. If you notice any cracks, fraying or other wear and tear, replace the ladder immediately to ensure your safety.
Finally, store the ladder in a safe place when not in use. This will help prevent it from slipping and potentially causing an accident. Keep it off the floor if possible and make sure that it is securely fastened to the wall with heavy-duty brackets.
These simple tips can help ensure that your RV bunk bed ladder is safe and secure for years of adventures. Enjoy the convenience of a safe, accessible ladder without any worries. With just a few safety precautions, you’ll be able to enjoy your road trips worry-free!
FAQ
How do you make a simple bunk bed ladder?
Making a simple bunk bed ladder is easy and doesn’t require many tools. First, you’ll need to measure the height of your bunk bed, as well as the distance between each rung on the ladder. Once you have those measurements, you’ll need to purchase two pieces of wood that match those dimensions. Next, you’ll attach each piece of wood at an angle using screws and washers. To finish, you’ll need to sand down the ladder and paint it for a finished look. With just a few supplies, you can easily make your own bunk bed ladder!
What is the purpose of a bunk bed ladder?
A bunk bed ladder not only provides easy access to the top bunk from floor level but also ensures the safety of kids. It serves as a convenient and stylish piece of décor, seamlessly blending with the overall design of the room. Additionally, it offers extra storage space, allowing you to optimize the functionality of the bunk bed. With a wide variety of options available in terms of shapes, sizes, and finishes, you can easily find a bunk bed ladder that perfectly complements your style and fits within your budget. So, whether it’s for added convenience, safety, or aesthetic appeal, a well-chosen bunk bed ladder is a versatile addition to any bedroom.
What are some safety tips for bunk bed ladders?
When using bunk bed ladders, always ensure that the ladder is securely attached to the frame and cannot be easily removed. Additionally, it is important to monitor kids when they are on top of the bunk bed as well as when using the ladder, especially for younger children. Make sure that you check your ladder often for any signs of wear or damage and replace parts as needed. It is also important to ensure that the ladder stays clean and clear of any tripping hazards. With these safety tips in mind, you can make sure your bunk bed ladder is safe for use!
How do you store a bunk bed ladder when not in use?
When not in use, a bunk bed ladder should be safely stored away. You can hang it on the wall or store it away from the bed. You can also keep it in a storage closet or garage, making sure that kids cannot access it easily. If you are hanging your ladder on the wall, make sure to use strong hooks and anchors to ensure proper stability. With these simple steps, you can make sure your bunk bed ladder is properly stored away, keeping it out of the way and safe from damage.
What is the angle of a bunk bed ladder?
The angle of a bunk bed ladder is usually around 60 degrees, although it can vary slightly depending on the model. This angle allows for comfortable and secure access to the bunk bed while also allowing the ladder to fit flush against the side of the frame when not in use. When measuring for your own bunk bed ladder, be sure to double-check this angle to ensure you get the right fit. A properly fitting bunk bed ladder will make it easy and safe for kids to use.
What materials are used in making a bunk bed ladder?
When designing a bunk bed ladder, the material used should be sturdy and long-lasting. Many ladders are made from strong woods like pine or poplar, which are both strong and lightweight. Other materials like metal, plastic, or even bamboo can also be used to make ladders. While metal may offer more stability at the cost of weight, wood is usually preferable for its durability and ease of installation. When choosing a material for your bunk bed ladder, consider your needs as well as safety and style. Whichever material you choose, make sure it’s strong and stable for the best results.
Useful Video: Bunk Bed Ladder For My Camper
Conclusion Paragraph
To build a bunk bed ladder for RV use, you’ll need to make sure that the materials are strong enough and up to code. Be sure to check with local regulations and codes before beginning construction of any kind. Make sure the ladder is securely attached at both top and bottom and consider adding non-slip features for added safety. With careful planning, quality materials, and good construction techniques, it’s possible to build a sturdy and safe RV bunk bed ladder.
References:
- https://home.howstuffworks.com/home-improvement/how-to-build/how-to-build-wooden-ladder.htm
- https://www.diydoctor.org.uk/projects/rope-ladder.htm