
As you prepare to bid farewell to another fun-filled camping season, there is one essential task that cannot be overlooked – blowing out your RV water lines. Just like a magician masters the art of illusion, you too must master the air pressure to ensure that your beloved camping companion stays in perfect condition during the long winter hibernation. So, grab your inflatable wand and get ready to discover the key tips for blowing out your RV water lines with the precision and finesse of a seasoned magician. This blog post will not only unravel the mystery of how much air pressure is required to do the job effectively but also share expert insights that will leave you feeling like you’ve just pulled off the greatest trick of all time – preserving the integrity of your RV’s water system.
Table of Contents
What is PSI?
PSI, short for pounds-per-square-inch, is a widely used unit of measurement employed to evaluate the pressure exerted by liquids in RV water lines. Understanding the importance of PSI is crucial in ensuring the optimal functioning and efficiency of your water system. Higher PSI values indicate a more robust and effective water flow, resulting in enhanced performance and satisfaction.
For instance, elevated PSI (pound per square inch) levels facilitate quicker delivery of hot water and improved water pressure during showers, ensuring a more enjoyable and refreshing experience. By paying attention to PSI ratings, you can greatly enhance your overall RV water system performance and convenience. With higher PSI levels, the water flow becomes more robust, allowing for a stronger and more satisfying shower experience.
This increased pressure ensures that you can fully enjoy the comforts of hot water, even in remote camping locations. Additionally, the efficient delivery of hot water means less waiting time, allowing you to spend more time enjoying your camping adventures. So, by considering PSI levels and their impact on your RV water system, you can optimize your camping experience and make the most out of your outdoor adventures.
How Do Air Compressors Work?
Air compressors are a type of machine that takes in air and compresses it into a smaller volume. This is done using a motor or an engine to drive internal components, such as pistons and valves, which move the air through the compressor. As air is compressed, its pressure increases – resulting in more energy being stored within it. This greater amount of energy can then be used for various purposes, such as powering tools or equipment and even providing a source of air in medical applications.
Air compressors are an essential part of any RV, and they can be used in a variety of applications to improve the efficiency and performance of your system. Whether it’s for powering tools or improving water pressure, air compressors are an invaluable tool that all RV owners should consider investing in [1].
What to Look for in An Air Compressor?
PSI
When shopping for an RV water line, the most important factor to consider is the PSI (pounds per square inch) rating. Generally speaking, the higher the PSI of your compressor, the longer it will last and be able to handle any job you may need from it. Lower PSIs are better suited for smaller jobs such as inflating tires or other small objects, while higher PSIs can handle larger tasks such as welding or pressure washing. It is important to know the specific job you need your compressor for to choose the best one with the correct PSI rating. For instance, to blow out RV water lines in an RV air compressor needs to have a PSI rating of at least 80.
CFM and Duty Cycle
The CFM (cubic feet per minute) of an RV water line is also important when choosing the right one for your needs. The CFM indicates how much air is being delivered by the compressor, and is usually measured in cubic feet per minute (CFM). A higher CFM will provide more air pressure at a given PSI rating meaning it can handle larger jobs. Duty cycle is also an important factor to consider when looking for an RV water line. It indicates how long the compressor can run without overheating or having to be cooled down. It is important to consider both CFM and duty cycle when choosing an RV water line, as they both indicate the overall performance of the compressor.
Power
The power of an RV water line is also important to consider when making a purchase. Most compressors are powered by either electricity or gasoline, and some may have both options available. Electric-powered compressors tend to be better suited for smaller jobs as they usually provide less power than gas-powered ones. Gasoline-powered compressors are typically more powerful and better suited for larger tasks. It is important to choose the right power option for your RV water line depending on what job you want it for.
Noise Level
The noise level of an RV water line is also something to consider when making a purchase. If you plan on using the compressor in a quiet environment, then it would be wise to go for one with a low noise level rating. On the other hand, if you plan on using it in an open area such as a garage or workshop then a higher noise level may not be as important. It is always best to check the manufacturer’s specifications when choosing your compressor so that you can make sure that it meets your needs [2].
What are some signs that you need to blow out your RV water lines?
Whether you’re a full-time RV enthusiast or just like to take the occasional road trip, one of the most important steps in preparing your recreational vehicle for winter storage is blowing out the water lines. This critical task prevents water from freezing inside of the plumbing and causing extensive damage to your RV. Here are some signs that it’s time to do this maintenance:
- You notice moisture in the external plumbing pipes.
- Water is no longer coming out of your faucet when you turn it on.
- Your water heater is emitting a strange smell.
- Rust or discoloration is visible in the piping.
- Strange noises are heard from the plumbing pipes when running water.
Performing routine maintenance and repairs on your RV is essential for keeping it in good working order. Blowing out the water lines is a great way to protect your plumbing system from harsh winter conditions. If you’re not sure how to do this, contact an experienced RV technician for help. They can provide guidance and recommendations so that you can keep your vehicle running smoothly for many road trips to come.
It’s also important to winterize your RV in other ways, such as replacing filters, lubricating moving parts, and cleaning the roof. Taking these steps will ensure that your RV is ready for your next big adventure!

How to Blow Out RV Water Lines?
Step 1: Obtain Compressed Air
The first step in the process of blowing out RV water lines is to obtain compressed air. This can be done by either renting or purchasing a compressor from a local hardware store or home improvement center or buying an electric inflator from an automotive supply store that works with vehicles. To ensure you have enough pressure for this task, look for a compressor that can produce at least 100 psi (pounds per square inch).
Step 2: Connect Compressed Air to the RV Water Lines
Before you start the process, it is crucial to ensure that all of the water is completely drained from the RV water lines. This can be achieved by opening all faucets and allowing the water to flow out. Once this step is successfully completed, you can proceed to the next step.
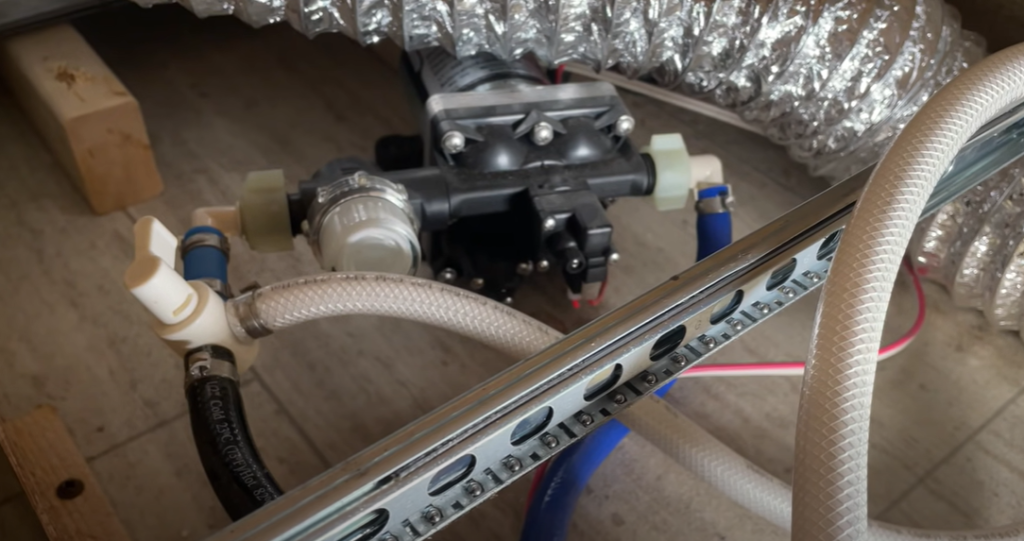
To begin, connect one end of an air hose to the compressor. Ensure that the air hose is of the appropriate length and has the necessary fittings to connect to the RV’s water lines. It is important to choose a fitting that provides a tight seal to prevent any air leaks during the process.
Next, locate a suitable fitting on the RV’s water lines to connect the other end of the air hose. Take extra care to ensure that the fitting is securely connected, as any loose connections can lead to air leakage and compromise the effectiveness of the procedure.
Step 3: Turn on the Compressor and Activate the Hot Water Tanks
When you are ready to begin, carefully turn on the compressor and activate both the hot and cold water tanks in your RV. This will initiate the process of building pressure in the water lines, which is necessary for releasing any trapped air or residual water. To effectively accomplish this, locate and engage the pressure-release valves on both tanks while simultaneously blowing out the water lines for a few seconds. By doing so, you will facilitate the removal of any potential lingering water and sediment that may still be present within the RV’s plumbing system. Taking these precautionary steps will ensure a thorough and efficient maintenance of your RV’s water system.
Step 4: Repeat the Process
Once you have completed this process, you should then turn off the compressor and disconnect the air hose from the RV’s water lines. This step is crucial to prevent any residual pressure from damaging the system.
Now, you can repeat the same steps for other water systems in your RV, such as shower heads or sink faucets. By doing so, you ensure that all of your water lines are properly cleared of any remaining water and potential contaminants, leaving them clean and ready for use.
Taking the time to thoroughly clean each water system in your RV helps maintain the overall cleanliness and functionality of your water supply, ensuring a worry-free experience during your travels.

Step 5: Inspect the Water Lines
Finally, once you have completed the process of blowing out your RV water lines, it is important to inspect them for any signs of damage or wear and tear. If you find any issues, such as leaks or cracks, then it may be necessary to replace the affected pipes before continuing with your camping trip. Taking these extra steps will help ensure that all of your RV’s water systems are safe and ready to use [3].
FAQ
How do you blow out an RV water line?
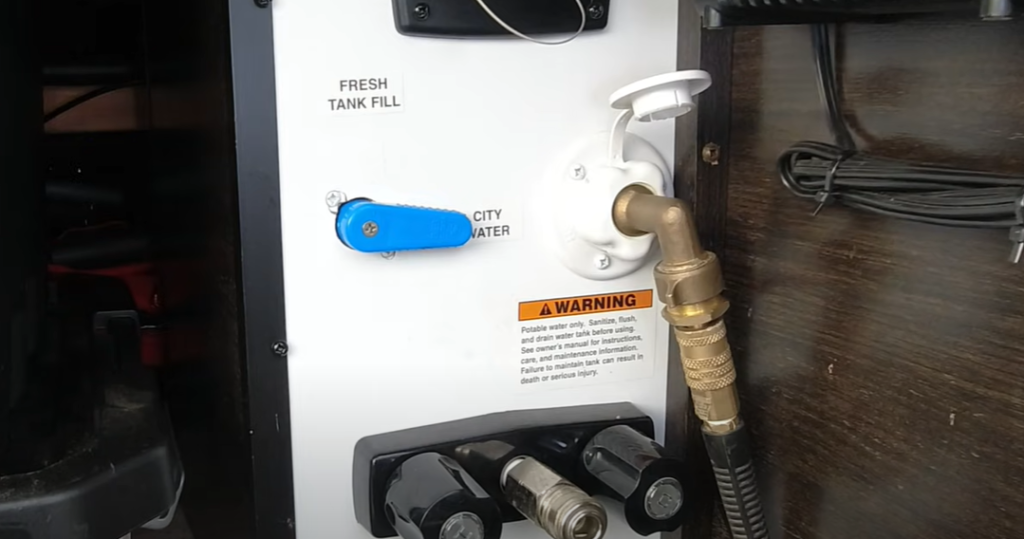
Blowing out an RV water line is a simple process that requires the use of compressed air. First, make sure to turn off the city water connection or disconnect from the water hose. Then, attach your compressor to the city water inlet located on the outside of your rig and secure it with a plastic tie. Turn on your compressor and open all faucets inside the RV. This will release some pressure and create a vacuum that will pull out any remaining water in the line. Once all of the water is gone, turn off your compressor and remove it from the city water connection. You can now close all faucets and reconnect to your city water hose or turn on the city water supply. Your RV’s water lines are now ready for use!
How often should I flush my RV’s water lines?
The best practice to keep your RV’s water system in top working condition is to flush the water lines every time you start a new camping trip. This will ensure that any dirt, debris or bacteria that may have built up over time has been thoroughly removed from the pipes. You can also flush your water lines regularly to minimize any potential issues with clogs or contamination.
What are some tips for preventing damage to RV water lines?
There are a few things you can do to help prevent damage and reduce wear and tear on your RV’s water lines:
- Make sure all connections, hoses and seals are securely tightened.
- Check for signs of leaks regularly.
- Replace old or cracked hoses immediately.
- Never store your RV with water lines connected.
- Use a water pressure regulator to keep the pressure at a safe level.
Following these tips will help you reduce the risk of damage to your RV’s water lines and keep them in good working condition.
What are the signs that an RV water line is blocked?
If your RV’s water lines become blocked, you may experience a drop in water pressure or a decrease in hot water temperature. You may also notice strange noises coming from the pipes or faucets and see low water flow or complete lack of water. If you suspect your RV’s water lines are blocked, it is important to have them looked at by a qualified technician as soon as possible.

Can I use regular PVC piping for RV water lines?
No, regular PVC piping should not be used for RV water lines because it can easily become damaged or brittle over time. It is best to use specially designed RV water line piping that is made with strong, durable materials to ensure the longest life in your rig’s plumbing system.
What size air compressor do I need to blow out RV water lines?
The size of the air compressor you need will depend on the length of your RV’s water lines. Generally, a 1/2-horsepower compressor with a 6-gallon tank and a flow rate of 2 to 3 cubic feet per minute is sufficient for most RVs. However, if your rig has long runs or multiple faucets, you may need to use a larger compressor with more power. Be sure to consult an expert if you are unsure of the best size and type for your RV’s water lines.
What is the best way to store my RV in winter?
The best way to store your RV during the winter months is to make sure all of its systems have been properly winterized. This means draining all of the water from your RV’s water lines and tanks, as well as emptying out any other liquids or chemicals stored inside. Once you have done this, make sure to cover your rig with a tarp or other breathable material to protect it from the elements. You should also disconnect the battery and use a battery tender to maintain its charge. Finally, store your RV in a dry, cool place that will not be exposed to extreme temperatures.
Useful Video: RV Winterizing – Blowing Out Plumbing Lines w/ Compressed Air – Complete Walk-Thru
Conclusion Paragraph
So, how much air pressure to blow out RV water lines? The answer is: that it depends. If you have a newer RV, you can safely use up to 40 psi of air pressure to blow out your water lines; however, if your RV is older and the pipes are more delicate, you may want to reduce this pressure. Additionally, before blowing out your RV’s water lines, make sure to disconnect all appliances so that foreign objects like dirt and debris don’t get blown into the system. Finally, always check with your RV manufacturer for specific instructions to follow when blowing out water lines. By following these instructions, you can make sure that your RV is safe and ready for the road ahead.
References:
- https://www.quincycompressor.com/how-do-air-compressors-work/
- https://www.acegroup.org.uk/air-compressor-buying-guide/
- https://www.doityourselfrv.com/how-to-blow-out-rv-water-lines/