Embarking on a road trip in your beloved RV is a thrilling adventure until you encounter the frustrating mystery of flickering or completely non-functional lights when you plug in. There’s no denying the sharp pang of disappointment that washes over you when your cozy home-on-wheels suddenly becomes a dimly lit cave. But fear not, intrepid traveler, for this article, has the solution to your illuminating woes. This blog post will delve into the perplexing realm of RV lights that refuse to work when plugged in, equipping you with the knowledge and troubleshooting strategies to banish darkness and restore brilliance to your mobile abode. So, grab your toolkit and summon your inner electrician, because it’s time to shed light on this RV mystery.
Table of Contents
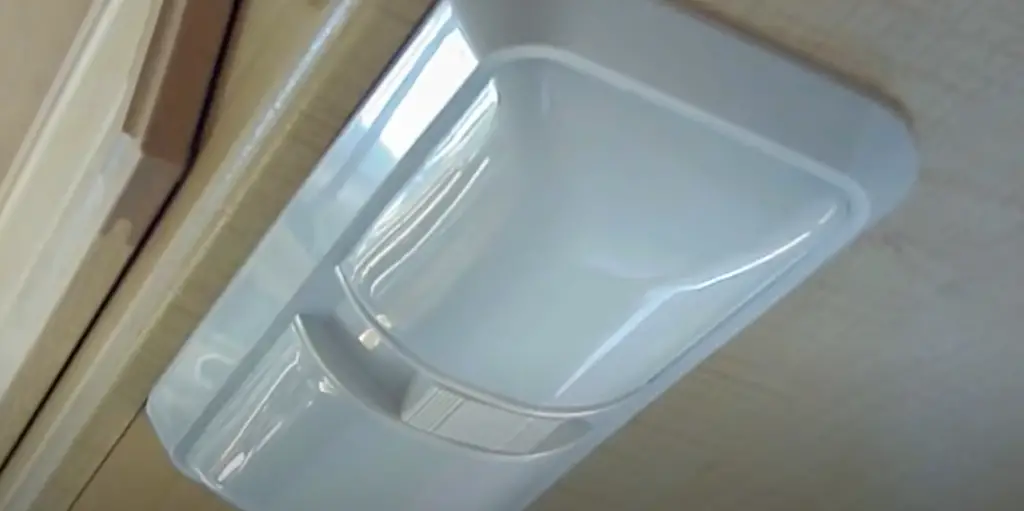
How Do RV Ceiling Lights Work?
Hands-on RVers know how important lighting is inside their recreational vehicle. Ceiling lights not only provide illumination but also set the mood inside the rig and can even add a touch of style. But what’s going on behind the scenes? How do these ceiling lights work to provide light when you need it?
Ceiling lights in RVs typically come in two styles: incandescent or LED. Incandescent lighting is the most common, but RVers are increasingly turning to LEDs for their energy efficiency and durability.
Incandescent lights use a filament inside a glass bulb that generates light when current is applied. The filament heats up and starts to emit visible light, which then reflects off the reflecting surface of the lamp to illuminate your RV.
LED lights use a semiconductor diode to create light when electricity is applied. This technology is more efficient than incandescent lighting and produces less heat, which makes it an appealing choice for RVers who want to keep their camper cool while running all day.
Once the wiring is set up and the fixtures are in place, RVers can easily install their lights and get them up and running. Installing LED lighting is particularly easy as they don’t require additional switches or transformers to run.
So next time you’re relaxing in your RV at night, take a moment to appreciate how quickly and easily ceiling lights can provide illumination. With a few simple steps, you can enjoy a bright and well-lit space in no time [1].
Why Do You Have to Plug In RV Ceiling Lights?
When looking to light up your RV, one of the most common options is to install ceiling lights. These are great for providing both visual and practical lighting solutions for your vehicle and they come in many different styles, shapes and sizes. But why do you have to plug them in?
The simple answer is that it’s a safety measure that helps prevent overheating. Just like any type of electric lighting, ceiling lights generate heat as they operate. This is why RV manufacturers require them to be plugged into a power source that can handle the load and draw away some of the heat.
In addition, most RV ceiling lights also come with a built-in temperature control switch that will turn off the light when it gets too hot. This is important as it helps to prevent any potential electrical fires that can be caused by the light overheating.
For extra safety, you should make sure that you purchase ceiling lights specifically designed for use in RVs. You should also ensure that they are installed properly and with the right wattage rating so as not to overload the circuit.
What to Do When Your RV Ceiling Lights Aren’t Working
Problem: The GFI is tripped.
When you’re on a road trip and your RV ceiling lights suddenly stop working, it can be quite frustrating. However, there’s a simple troubleshooting step you can take to resolve this issue. The first thing to check is the GFI (ground fault interrupter), which is a safety feature commonly found in many RVs. It’s usually located near the entry door or in the bathroom and has a reset button. If the GFI is tripped, it can cause all of your interior lights to turn off. But don’t worry! Just locate the GFI, press the reset button, and voila! Your lights should start working again, illuminating your RV and bringing back that cozy ambiance for your trip.
Problem: The Light Fixture is Loose.
If your RV ceiling lights still aren’t working after resetting the GFI, check to make sure that the light fixtures are securely mounted in place. If they have become loose due to vibration while driving, this can cause them to lose contact with the wiring and stop working. To fix this, take a look at your RV’s manual for instructions on how to properly mount the light fixtures again. Once they are tightly secured, you should be able to turn them back on and enjoy those cozy vibes inside your RV once more.
Problem: The Lightbulb is Fried.
It’s also possible that the lightbulb itself has burned out, resulting in your RV ceiling lights not working. If you’re sure the issue isn’t with the GFI or the light fixtures, then it might be time to change out the bulbs. Before replacing any lighting components, make sure to read your vehicle’s manual for specific information on which type of bulbs should be used. That way, you can avoid any potential hazards or malfunctioning lighting fixtures. Once the new lightbulb is installed, you can once again enjoy a well-lit RV while on the road!
Problem: The circuit breaker is tripped.
If the circuit breaker is tripped, the RV ceiling lights will not be able to turn on. This is a safety feature of your RV’s electrical system that prevents unsafe power loads and potential damage to the vehicle. Luckily, this issue can be easily resolved by resetting the circuit breaker. Identify which one is associated with your lights, then flip it off and back on again. If successful, you should now be able to turn back on your RV ceiling lights and go about your trip in a well-lit vehicle.
Problem: Your ceiling light ballast is faulty.
If all of the above troubleshooting steps don’t resolve your issue with the RV ceiling lights, then one of the ballasts may be faulty. Ballasts are electrical components that regulate the current supplied to a lighting fixture and provide it with enough power to stay illuminated. If your ballast has malfunctioned, you’ll need to replace it before your lights can be turned back on. You may need a professional electrician to do this, so make sure to check with your RV manufacturer before attempting any kind of repair yourself.
Problem: The wiring is in terrible shape.
It could be that the wiring in your RV has been damaged and needs to be replaced. Over time, wiring can become brittle or corroded due to long periods of exposure to the elements. This can cause short circuits or worse – a fire hazard – so make sure you check your cables for any physical damage before attempting to repair them yourself. If the wiring is in poor condition, you should contact a qualified electrician or RV specialist for help with replacing it safely and correctly.
How to Fix the RV Lights While Not Working on Shore Power?
Reset the Circuit Breaker
The first step to fixing RV lights is to reset the circuit breaker. This can be done by unplugging your RV from shore power, turning off all your lights, and then resetting the circuit breaker. You may need to press down on a small lever or button to reset it. Once you have done this, plug your RV back into shore power and check to see if the lights work.
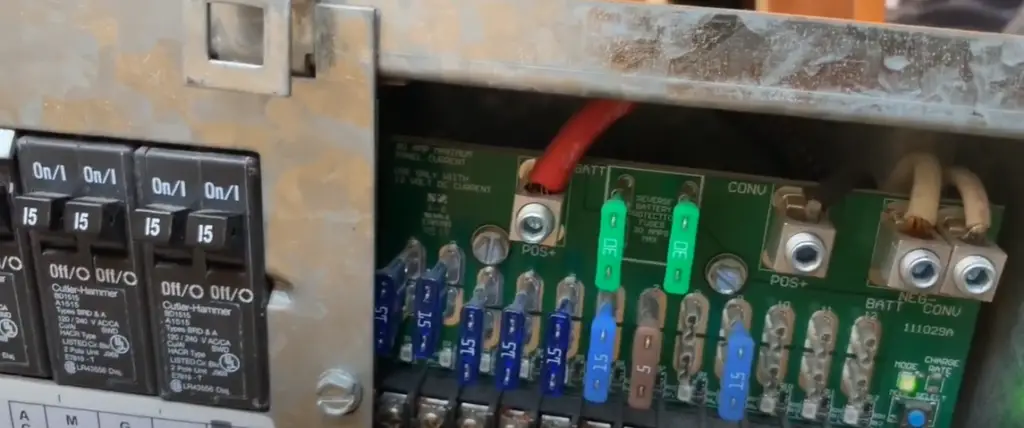
Checking the Fuses
If resetting the circuit breaker doesn’t fix the problem, then you’ll need to check your RV’s fuses. Start by locating your fuse box, which usually can be found near the main power source or inside a cupboard. Open up the fuse box and inspect all of the fuses. If any of them look worn or damaged, you’ll need to replace them with new ones. Once you have replaced the fuses, plug your RV back into shore power and check to see if the lights are now working.
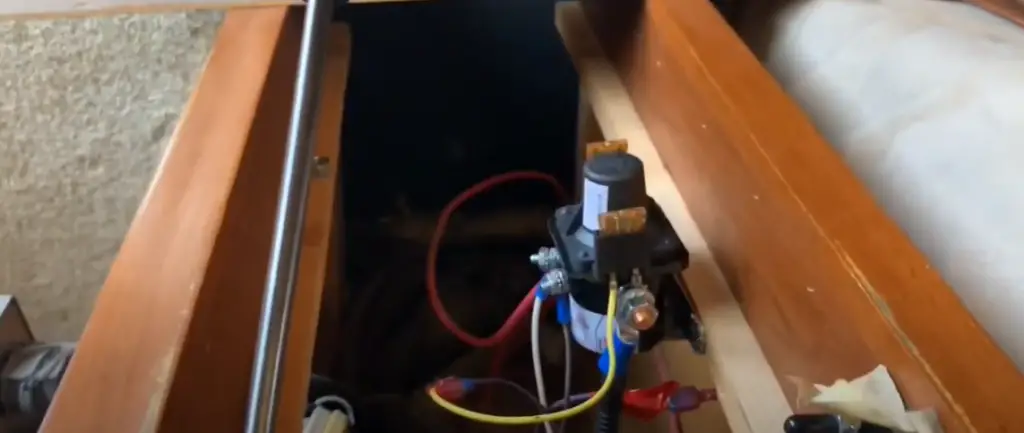
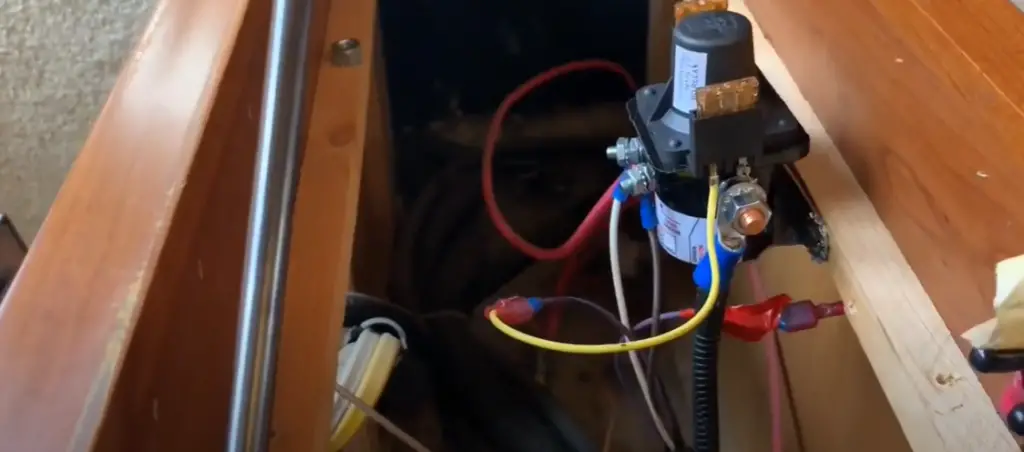
Checking Wiring
If neither of those methods has solved the problem, then it may be time to check the wiring. Start by unplugging your RV from shore power and turn off all of the lights. You’ll need to remove any covers that may be obstructing access to the wiring. Inspect each wire for signs of wear, damage, or corrosion. If you find any damaged wires, then you may want to consider replacing them with new ones before plugging your RV back into shore power. Once you’ve done this, check to see if the lights now work.
Replace the Fuse
If you’ve checked the wiring and there are no signs of damage, then you may want to consider replacing the fuse. This is a simple process that only requires a screwdriver or other tool depending on your RV model. Once you have removed the old fuse, replace it with a new one that has the same rating as the old one. Then plug your RV back into shore power and see if the lights now work.
Replace the Battery
If all of these troubleshooting steps have failed, then it may be time to consider replacing the battery. Start by disconnecting the negative terminal and removing the old battery from its housing. Once you’ve done this, insert a new lead-acid RV battery in its place and connect the positive and negative terminals. Finally, plug your RV back into shore power and check to see if the lights are now working.
Screw the Bulb Firmly
Sometimes, the problem with RV lights not working can be as simple as a loose bulb. In this case, just unscrew the old bulb and replace it with a new one. Once you have done this, make sure that you screw in the new lightbulb firmly before plugging your RV back into shore power. This should solve any issues related to lighting and ensure that your RV lights stay functional.
Replace the Inverter or Converter
Finally, if all else fails, then you may need to replace either your inverter or converter. This is a complex process and it’s best left to a professional technician. You must get the right part for your RV so make sure that you buy one from a reputable supplier. Once the new inverter or converter has been installed, plug your RV back into shore power and check to see if the lights are now working [2].
How much does it cost to replace complete RV wiring?
The cost of replacing the entire wiring system in an RV can range from $500 to over $5,000 depending on the size and complexity of the job. Generally speaking, a basic overhead light replacement in a small camper will cost around $100-200 while more extensive replacements such as those required for bigger trailers may be closer to $2,000 or more. Additionally, material costs for wiring and other components such as switches or connectors can add to the total cost of the job.
To get an accurate estimate for your RV, it’s best to consult a professional electrician. They will be able to assess the situation and provide you with an exact quote tailored specifically to your needs.
Finally, when replacing any kind of lighting in your RV, opt for LED lights. They are more energy efficient and will last much longer than traditional incandescent bulbs. Not only will this save you money in the long run, but it is also better for the environment.
By investing in quality lighting solutions now, you can ensure your RV’s electrical system stays safe and running smoothly for many years to come.

FAQ
Why am I not getting power to my RV lights?
If your RV lights are not turning on, the most likely cause is a lack of power. This may be because you have blown a fuse, tripped a circuit breaker or disconnected the main wires to the light fixtures. To determine if this is the case, check all switch panels and breakers in your RV to ensure that everything is properly connected. If all connections are okay, then the problem is likely caused by a faulty bulb or fixture. Replace any bulbs or fixtures that show signs of wear and tear and test the lights again. If you still have no luck, it may be time to call in an RV electrician to inspect the wiring system. They will be able to diagnose the issue quickly and accurately, ensuring your RV lights are back up and running in no time.
What type of RV lighting is best?
The best type of RV lighting will depend on your needs and preferences. LED lights are a popular option that offers bright, long-lasting illumination without using much power or generating heat. Incandescent bulbs provide softer light but can be quite costly to operate due to their high energy consumption. Halogen lamps offer a mix of these two options, providing bright, efficient lighting with a longer lifetime than incandescent bulbs. Ultimately, it is up to you to decide which type of RV light works best for your particular situation.
How can I save money on RV lighting?
One way to save money on RV lighting is to switch to LED lights, as they are more energy efficient and require less maintenance than traditional bulbs. If you don’t want to switch to LED, then make sure your current light fixtures are in good working order by regularly inspecting them for any signs of damage or wear and tear. Also, ensure that all windows and doors are properly sealed off so that no heat is lost through the walls. Finally, consider installing a motion sensor light that will only turn on when needed, saving you energy and money in the long run.
Useful Video: RV DC Power Not Working | Quick Fix Solution
Conclusion
So, if RV lights are not working when plugged in, you may be dealing with a few different issues. First, check the power connections to make sure everything is properly plugged in and that your RV is getting enough power. Additionally, inspect any wiring for corrosion or loose connections that could cause an issue. If all else fails, it might be time to contact a professional electrician who can help you diagnose and fix any potential problems. In the meantime, take advantage of the natural light while you can and enjoy your RV experience!
References:
- https://www.mortonsonthemove.com/rv-lights/
- https://vehiclefreak.com/rv-ceiling-lights-not-working-when-plugged-in-causes-fixes/